
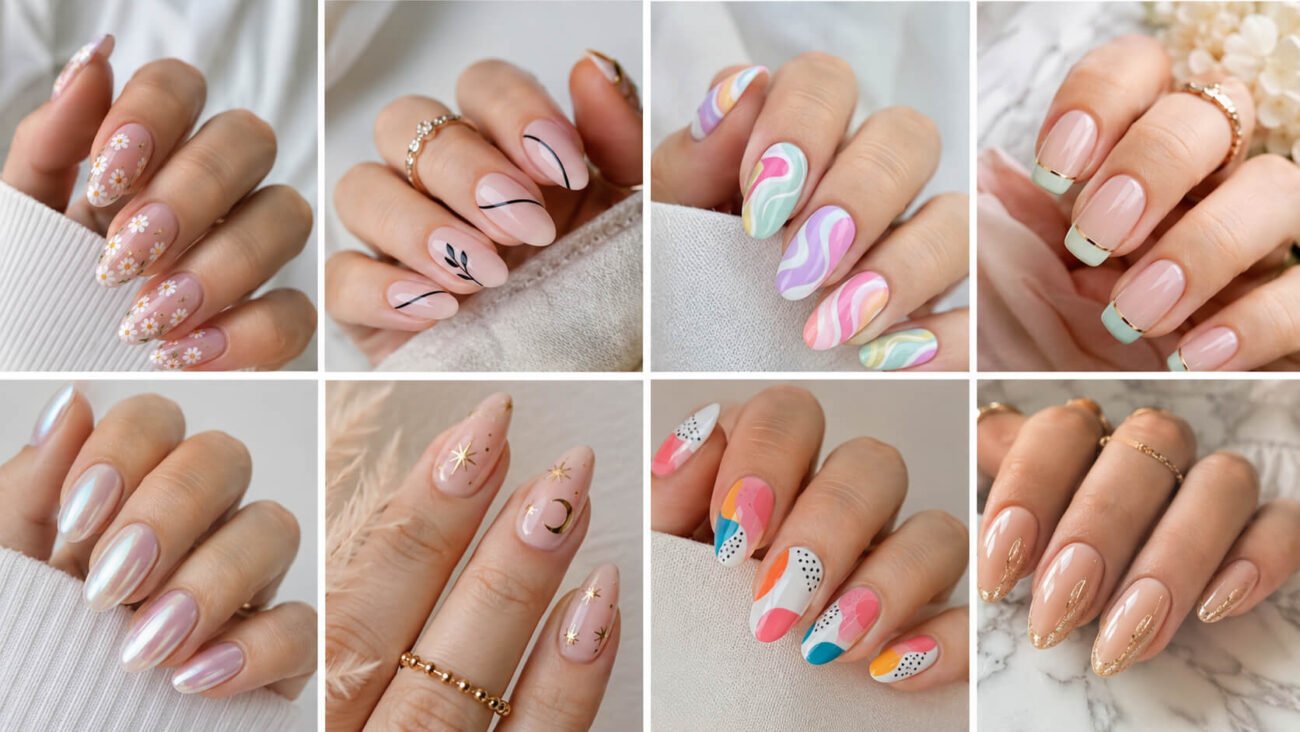
Nail art ideas can turn a manicure into a small collection of objects, textures, and stories. The most memorable sets do not need to rely on familiar flowers, French tips, blended color, or repeated metallic finishes. A thoughtful theme can come from vintage stationery, game pieces, museum objects, paper crafts, or old photography.
Short square nails suit compact symbols, while oval and almond shapes provide more room for curved reliefs and layered scenes. The six directions below explore distinct themes with no repeated visual storyline. Each one can be simplified for daily wear or expanded for a more expressive salon manicure.
Wax Seal Nail Art for Antique Impressions
Wax seal nail art brings stamped letters and private invitations to the hands through rounded pools of color, embossed symbols, and softly uneven edges. Burgundy, forest green, midnight blue, cream, and antique gold create a rich palette, while dusty pink feels more romantic.
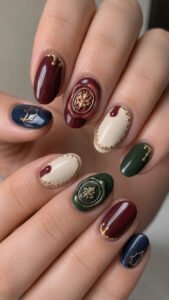
One complete impression on each hand is usually enough. The remaining nails can carry smaller drips, stamped borders, or a matching solid shade.
Press a Tiny Crest Into Sculpting Gel
Create a small mound of thick gel near the center or lower corner, then shape it into a softly irregular circle. Before setting the surface, press a miniature crest, initial, star, or emblem into the middle. Keep the impression shallow so the design remains comfortable.
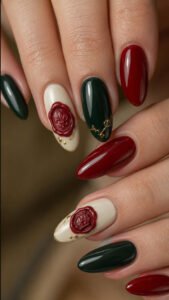
Deep red over cream feels traditional, while dark green with gold looks dramatic. Surround the accent with simple nails in one supporting color so the stamped symbol remains easy to notice.
Form Metallic Sealing Pools
Metallic sealing pools use gold, bronze, or pewter gel to imitate melted wax without a separate emblem. Place the color in an uneven round shape and allow one narrow trail to extend toward the edge.
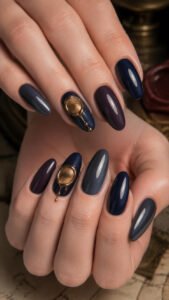
A dark navy, plum, or charcoal base strengthens the contrast, while nude polish creates a quieter version. Add a tiny raised dot where the trail meets the seal. Use this detail on two nails and keep the others smooth for balance.
Matchbook Cover Nail Art for Retro Miniatures
Matchbook cover nail art turns each finger into a tiny illustrated package through bold borders, simplified pictures, number marks, and textured strike panels. Warm red, faded yellow, teal, cream, brown, and black support the nostalgic mood.
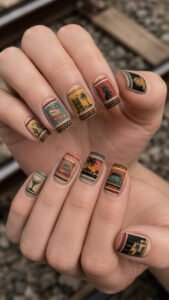
The designs can reference cafés, roadside stops, old hotels, or imaginary clubs without using readable brand names. Short square nails naturally suit the rectangular layout, while longer shapes can carry taller illustrations.
Paint Illustrated Cover Labels
Begin with a solid background, then add a narrow border and one simple central image such as a lamp, cocktail glass, moon, chair, or small building. Keep the illustration flat and use only two or three colors.
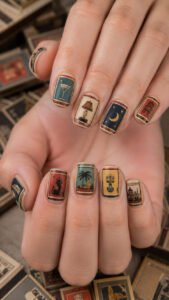
A tiny number or invented initial can sit near one corner, but lengthy wording should be avoided. Change the image across selected nails while repeating the same border color. This creates a collected matchbook feeling without making the manicure look random.
Add a Textured Strike Strip
A strike strip brings tactile detail to the lower edge of the design. Paint a narrow brown, charcoal, or muted red band, then stipple it with tiny irregular marks to imitate the rough surface. Keep the texture visual rather than sharply raised.
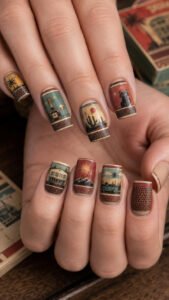
One nail can feature only the strike panel while another shows the full cover above it. A satin top layer supports the printed paper mood, while selective gloss makes the central picture appear freshly lacquered.
Fossil Relief Nail Art for Earthy Dimension
Fossil relief nail art takes inspiration from preserved spirals, ancient tracks, and stone impressions rather than ordinary shell or botanical decoration. Sand, clay, limestone, charcoal, rust, and muted cream create a grounded palette.
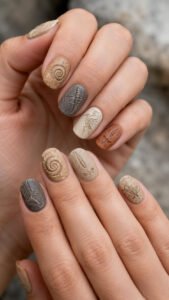
The surface can remain matte to resemble dry stone or receive a soft satin layer for depth. Raised details should stay low and smooth, allowing the manicure to feel artistic without catching on clothing.
Shape Ammonite Spiral Impressions
Build a shallow spiral from the center outward using a narrow line of sculpting gel. Add small curved divisions along the coil to suggest ammonite chambers, then cover everything with one stone inspired shade.
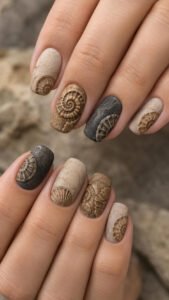
Lightly brush a deeper tone into the grooves so the spiral becomes visible without strong outlines. Use the complete fossil on one accent nail and partial curves nearby. Cream over clay feels soft, while charcoal over sand creates stronger contrast.
Etch Tiny Trilobite Tracks
Trilobite inspired marks use an oval center, repeated side segments, and a narrow trail of small impressions. Paint the shape close to one edge so the surrounding base remains open. Brown over limestone beige creates a natural result, while black over muted rust feels graphic.
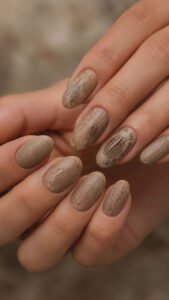
A few track marks can continue onto another nail without repeating the full fossil. Finish with matte polish, then add a small satin highlight along the center for definition.
Domino Night Nail Art for Graphic Contrast
Domino night nail art uses divided tiles, numbered pips, and falling sequences to create a manicure that feels playful but controlled. Black and ivory provide classic contrast, while plum with blush, cobalt with cream, or green with pale yellow offers more color.
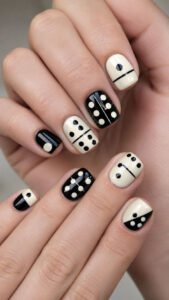
The rectangular tile shape works especially well on short square nails. Combine full tiles with cropped corners, dividing bars, and single oversized pips.
Arrange Oversized Game Tiles
Divide selected nails with one narrow central line, then place a different number of round pips on each side. Keep the circles evenly sized and leave enough open space so the tile remains readable. Reverse the colors on alternating fingers, such as ivory pips over black followed by black pips over cream.
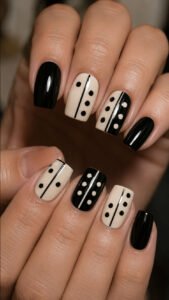
One solid nail on each hand can prevent the set from feeling too literal. A high shine finish gives the smooth appearance of polished game pieces.
Build a Falling Domino Sequence
A falling sequence shows narrow tile silhouettes leaning at changing angles across several nails. Start with an upright rectangle on one finger, tilt the next shape slightly, and continue until the final tile appears almost horizontal. Add only a few pips so the direction remains the main detail.
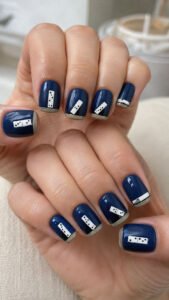
Deep blue with white or burgundy with pale pink can make the sequence feel less traditional. When the fingers sit together, the changing angles create one connected story.
Paper Quilling Nail Art for Rolled Curves
Paper quilling nail art is inspired by thin strips rolled into coils, loops, teardrops, and open scrolls. The design creates graceful craft inspired movement through narrow sculpted curves.
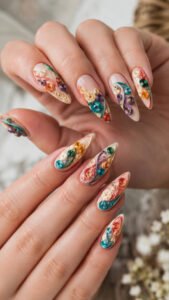
Cream, coral, turquoise, lavender, mustard, and deep green can form a lively palette. Raised gel lines should stay narrow and low so the shapes resemble rolled paper rather than heavy sculpture.
Form Teardrop Coil Shapes
Create a small circular coil, then extend one side into a pointed teardrop. Place two or three shapes in different directions while leaving clear space between them. Contrasting colors make each coil easy to see, although a tonal palette feels more refined.
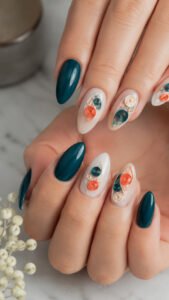
Coral over blush creates warmth, while teal over cream looks crisp. Keep the inner spiral visible and smooth every edge before sealing. One solid finger in the darkest shade will give the coils breathing room.
Build Open Scroll Corners
Open scroll corners begin with a loose curved line that rolls inward without closing into a complete circle. Position the scroll near the cuticle, outer corner, or side wall, then add one smaller curve beside it. Change the direction across the manicure so the design appears arranged by hand.
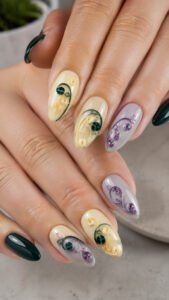
Deep green over pale yellow feels artistic, while lavender over gray creates a softer mood. A glossy top layer protects the narrow lines and keeps the curves polished.
Film Negative Nail Art for Cinematic Storytelling
Film negative nail art creates a miniature contact sheet through dark frames, sprocket openings, faded images, and warm light leaks. The concept works beautifully in black, sepia, cream, amber, and muted red, although blue creates a cooler mood.
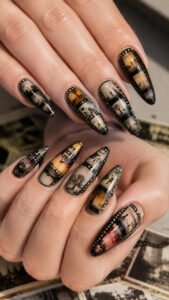
Each nail can represent a different frame from the same imaginary story. Longer nails allow several frames, while short nails can carry one picture bordered by the familiar perforated edge.
Run a Contact Sheet Across the Nails
Paint a dark horizontal frame near the center, then divide it into small picture sections that continue from one finger to the next. Inside each frame, add a simplified silhouette such as a doorway, chair, cloud, road, or building. Place small rectangular sprocket marks along the edges.
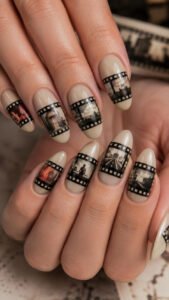
Keep the palette limited to black, cream, and one muted accent color. When the hands rest together, the separate images will read like one connected sequence of captured moments.
Create a Warm Light Leak Exposure
A light leak introduces translucent amber, coral, or red along one side of a dark photographic frame. Blend the color softly into the image so it resembles film briefly exposed to light rather than an ordinary gradient.
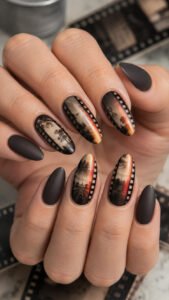
Use the effect on only two or three nails and vary its position. A shadowy blue or brown base will help the warm color glow. Keep nearby fingers in matte charcoal or sepia so the exposure remains the most noticeable feature.
Carry One Small Story Into Your Next Manicure
The best nail art ideas often begin with an object or texture that already holds a mood. Wax seals feel private and ceremonial, while matchbook covers bring illustrated nostalgia. Fossil impressions add earthy history, domino pieces create playful order, quilling curves introduce handcrafted movement, and film negatives turn the manicure into a sequence of images. Choose one concept that matches your nail length and routine, then adjust the colors and detail to make it personal. You can also explore related articles about nail shapes, hand care, jewelry combinations, outfit styling, hairstyles, and occasion beauty for a complete look. A manicure becomes memorable when every detail supports one clear story instead of repeating ideas you have already worn.
