
Short coffin nails create a structured outline without dramatic length. Their tapered sides and flat tips carry bold color and precise art when details are scaled carefully. The ideas below avoid every theme used in earlier articles. Instead, they explore abacus rails, window blinds, metronomes, aircraft panels, spinning tops, and croquet equipment.
Each concept includes three interpretations, keeping both hands connected without repeating one image. Color placement and scale can also be adjusted for square, squoval, or softly tapered coffin finishes.
Abacus Rail Nails With Balanced Bead Movement
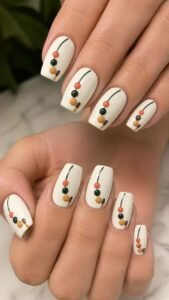
Abacus rail nails turn counting tools into organized color stories suited to a flat coffin tip. Slim rails create direction, while spaced beads soften the tapered outline. Cherry, cobalt, pistachio, cream, and charcoal make the theme playful without looking childish.
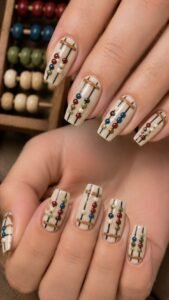
Short nails need only one or two rails. A calm background keeps every bead group readable and lets the tiny changes in spacing become the main decorative feature.
Shift Cherry Beads Toward One Corner
Paint the nail warm cream and draw one charcoal rail across the lower third. Place four cherry beads along it, gathering three near one corner and leaving the fourth closer to the opposite side.
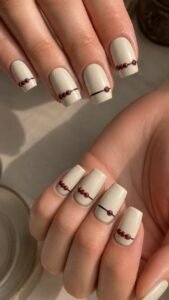
Give the separated bead a tiny cobalt center. The uneven spacing suggests movement, while the open upper nail prevents crowding.
Cross Two Cobalt Rails Over Pistachio
Use a muted pistachio base and place two cobalt rails at different angles, allowing them to cross near the side. Add two cream beads to the upper rail and three charcoal beads to the lower one.
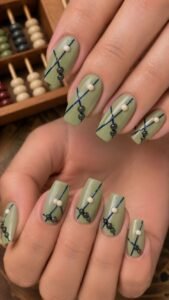
Keep the beads on opposite sides so both paths remain visible. The diagonal arrangement visually stretches the tapered shape.
Frame the Tip With a Counting Row
Apply deep charcoal polish and build one cream rail just below the flat tip. Arrange five small beads across it in alternating coral and powder blue, varying their widths for a handmade rhythm.
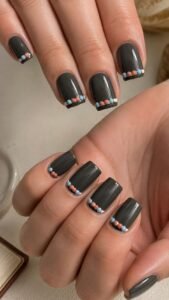
Leave a narrow charcoal border above the rail to preserve the coffin edge. Another nail can show two cropped beads entering from one side.
Venetian Blind Nails With Controlled Light Gaps
Venetian blind nails use tilted slats, pull cords, and light gaps to create clean depth. Ivory, tobacco brown, pale blue, olive, and black produce a sophisticated palette. Straight slats complement coffin tips, while angled placement avoids ordinary stripes.
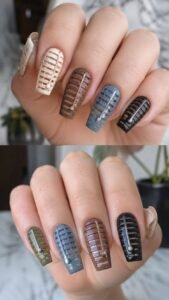
Each nail can show a different opening position, creating a sequence that feels connected while still changing from finger to finger.
Tilt Ivory Slats Across Tobacco Brown
Cover the nail in tobacco brown and paint four ivory slats travelling diagonally across the surface. Make the lowest slat widest and the upper one narrowest, then add a soft black shadow beneath each lower edge.
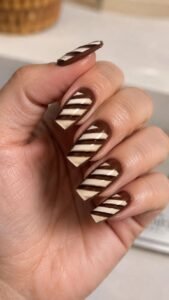
Stop before both sidewalls so the brown base forms a frame. The angled spacing follows the taper without overwhelming the length.
Open a Pale Blue Light Gap Through Olive
Use an olive base and arrange three darker green slats across the center, leaving one wider pale blue opening between the upper two. Add a thin cream highlight to suggest daylight.
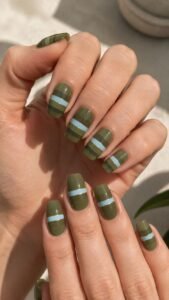
Keep the cuticle and tip solid olive. This concentrated opening brightens the manicure while remaining graphic.
Hang a Black Pull Cord Near the Side
Paint the nail soft ivory and draw one fine black cord close to the outer side. Add a small olive weight near the cuticle and two pale blue loops higher on the line.
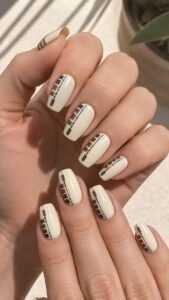
Place three short tobacco slats behind the cord. The side placement leaves the center open and lengthens the shape.
Metronome Nails With Measured Graphic Rhythm
Metronome nails bring tapered cases, moving arms, weights, and measured marks into a quiet musical manicure. Navy, walnut, ivory, coral, and brass create refined contrast. The tapered case echoes the sides of short coffin nails.
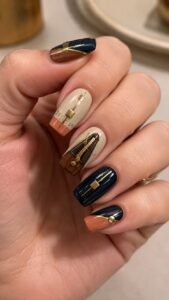
Use one complete metronome, then distribute its smaller parts across nearby fingers. This approach gives the manicure rhythm without turning every nail into the same instrument.
Center a Walnut Case Over Ivory
Apply an ivory base and paint one walnut metronome case through the center, widening it near the cuticle and narrowing it toward the tip. Add a small brass plate across the lower section and one coral timing mark above it.
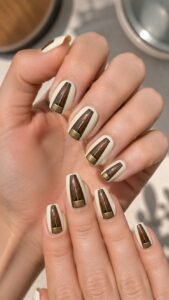
Leave a slim ivory border. The centered taper mirrors the nail outline and keeps details clear.
Swing a Coral Arm Across Navy
Paint the nail deep navy and draw one slender coral arm beginning near the cuticle, leaning toward the opposite corner. Add a small ivory sliding weight halfway along the arm and a brass pivot at the lower end.
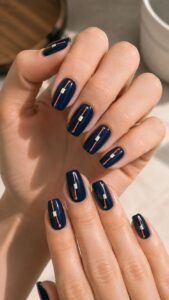
Keep the surrounding blue plain. Reverse the direction on the other hand for movement.
Mark a Tempo Scale Along the Edge
Use a warm beige foundation and place five short walnut marks along one outer side, shortening them toward the tip. Add a narrow navy line beside them and one coral block near the middle to suggest a selected tempo.
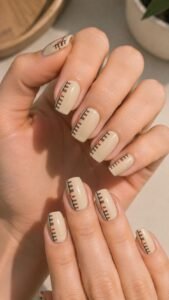
Keep the marks separate. The cropped detail connects with the main accent while preserving a clean center.
Aircraft Panel Nails With Riveted Industrial Detail
Aircraft panel nails use inspection hatches, rivets, warning blocks, and joined sections for a sleek industrial manicure. Slate, cream, muted orange, military green, and graphite give the theme a modern finish without chrome or mirror effects.
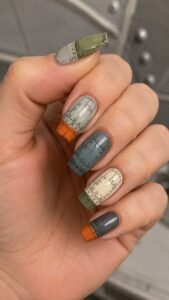
Tapered sides naturally frame the compact hardware. Keep every rivet flat and vary the panel direction across the hands. Satin and glossy finishes can separate the sections without introducing another decorative material.
Bolt a Slate Hatch Over Military Green
Paint the nail military green and place one slate rectangle slightly away from the center. Add four small cream rivets at its corners and a narrow graphite shadow along the lower edge.
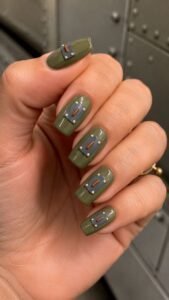
Add one muted orange handle. Open green space keeps the mechanical detail balanced.
Divide Cream Panels With an Orange Seam
Use a graphite base and add two cream panels that meet along one angled muted orange seam. Make one panel larger and add three slate rivets.
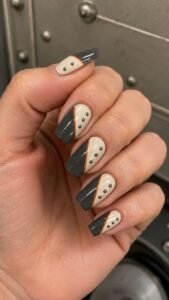
Leave a small graphite gap between the seam and the tip so the design does not become a standard diagonal split. The unequal sections add movement while preserving a smooth finish.
Crop a Circular Inspection Port at the Tip
Apply slate polish and paint one large cream circle partly beyond the flat tip. Add a military green inner ring and two graphite screw points along the visible edge.
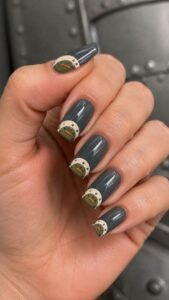
Add a small orange opening tab. The cropped circle creates a strong close view suited to short nails.
Spinning Top Nails With Rotating Color Balance
Spinning top nails use pointed bases, striped bodies, and motion arcs to create energy. Raspberry, ochre, teal, cream, and dark brown form a playful but polished palette. The top can appear upright, tilted, or viewed from above.
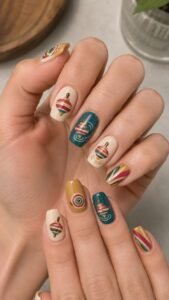
Rounded bodies soften the outline, while pointed bases emphasize the flat tip. The changing viewpoints also make a compact manicure feel more animated and carefully planned.
Balance a Raspberry Top Over Cream
Paint the nail cream and build one raspberry top near the center with a broad rounded body and a narrow ochre point aimed toward the tip.
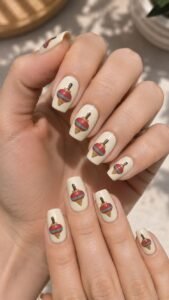
Add one teal band across the middle and a small dark brown handle at the upper edge. Shift it slightly aside so it feels caught in motion.
Tilt an Ochre Top Across Teal
Use a deep teal base and paint one ochre spinning top leaning diagonally across the lower half. Add a raspberry underside and a cream highlight along the upper curve.
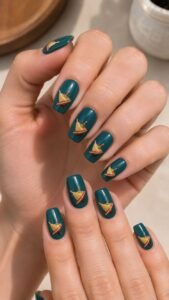
Draw one short dark brown arc behind the point. Keep the upper tip plain teal so the angled object remains clear.
Show a Rotating Disk From Above
Apply a soft beige foundation and place one large teal circle partly beyond the side. Divide it into three curved sections using raspberry, ochre, and cream, then add a small dark center.
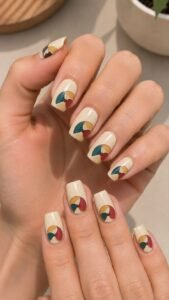
Keep the boundaries crisp. The cropped overhead view creates a bold accent for short coffin proportions.
Croquet Wicket Nails With Garden Game Precision
Croquet wicket nails combine hoops, mallets, ball paths, and clipped lawn color for a refined outdoor theme. Deep green, white, coral, butter yellow, and dark wood provide contrast without repeating tennis courts, billiards, bowling lanes, or rowing details. Broad hoops remain clear, while slim handles follow the tapered sides.
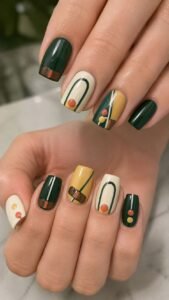
Use one complete wicket on each hand, then add cropped mallets or grouped balls elsewhere. This keeps the garden game theme recognizable while protecting the clean space that short nails need.
Arch a White Wicket Over Deep Green
Cover the nail in deep green and paint one broad white wicket rising from the cuticle area. Keep the sides nearly straight before curving them together near the upper half.
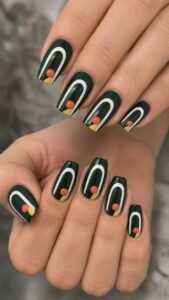
Place one coral ball partly beneath the arch and add a short butter yellow path behind it. The open shape frames the ball and makes the flat tip feel wider.
Crop a Dark Wood Mallet at the Tip
Use a butter yellow base and place one dark wood mallet head across the flat tip, allowing both ends to disappear beyond the sidewalls. Add a narrow coral band around the center and extend a slim green handle diagonally toward the cuticle.
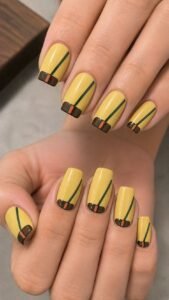
The close viewpoint creates a bold graphic while leaving the lower surface open.
Guide Three Balls Along a Curved Route
Paint the nail warm white and arrange three small balls in coral, green, and yellow along one gentle curve. Place a short dark wood marker beside the final ball and add one thin green route line that stops before the cuticle.
Keep the spacing uneven to suggest movement. The clean background preserves a polished finish.
Let Short Coffin Nails Turn Structure Into Personal Style
Short coffin nails feel expressive when artwork follows their tapered sides and flat tips. Abacus rails bring organized color movement, while Venetian blinds create controlled light gaps. Metronomes introduce measured rhythm, and aircraft panels add engineered detail. Spinning tops offer playful motion, while croquet wickets finish the collection with crisp outdoor structure. Choose the concept that suits your wardrobe, then adjust the colors without losing its construction. You can also explore related articles about coffin nail shapes, short acrylic nails, manicure colors, nail care, outfit combinations, jewelry styling, salon inspiration, hand care, and seasonal beauty ideas for a complete look.
