
Nail styles feel most distinctive when the manicure borrows from an unexpected craft and translates it into color, structure, and finish. The result can look intricate without covering every nail in heavy decoration. Short rounded and square nails suit cropped motifs, while oval and almond shapes allow longer curves, layered shadows, and balanced compositions.
The six styles below explore eggshell lacquer, kinetic mobiles, bismuth crystals, encaustic pigment, luthier rosettes, and mezzotint shading. Each direction uses the current appeal of sheer bases, precise linework, tactile illusion, and personalized variation while keeping every concept completely different from the designs used before.
Eggshell Lacquer Nails With Ivory Fragment Inlay
Eggshell lacquer nails use tiny pale fragments arranged over a dark polished surface, creating a delicate network of irregular shapes. The contrast feels refined because the pieces remain quiet in color while their spacing provides detail.
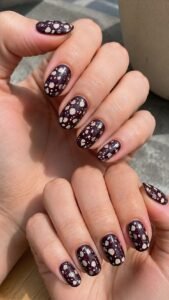
Black plum, deep pine, espresso, and oxblood make strong backgrounds, while ivory, chalk, and pale gray create the inlay. This style works on short nails because only a small cluster is needed, yet longer shapes can carry a broader field that seems to continue beyond the edges.
Gather Fragments Near One Corner
Place several small ivory shapes close to one side of the nail, keeping their edges angular and their sizes slightly different. Leave narrow channels of the dark base between every piece so the pattern does not become one pale patch.
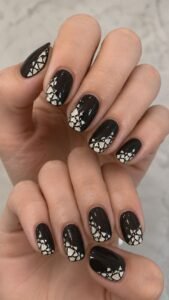
Allow the cluster to become lighter and more open as it moves toward the center. Repeat the direction across several nails, then reverse it on one accent finger to make the set feel assembled by hand.
Form a Broken Crescent
Arrange pale fragments into a curved band that follows part of the cuticle or side wall without becoming a complete outline. Keep one area densely packed and allow the opposite end to dissolve into two or three isolated pieces.
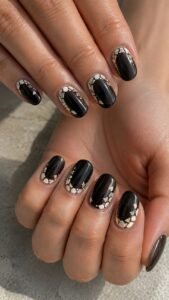
A tiny amount of warm beige can soften the ivory and make the inlay appear naturally varied. The unfinished crescent gives the manicure movement and leaves enough open lacquer for the deep background to remain important.
Polish One Fragment More Brightly
Finish most of the pale pieces with a soft satin surface, then add clear gloss to one larger fragment on each accent nail. The changing reflection will make that piece appear newly polished while the others look older and softer.
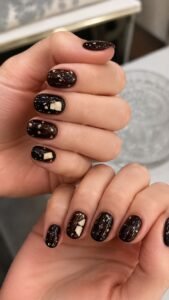
Keep the selected fragment in a different position on each hand. This subtle finish contrast adds depth without gems, metallic powder, or raised decoration, preserving the smooth character of the lacquer style.
Kinetic Mobile Nails With Suspended Balance
Kinetic mobile nails take inspiration from thin rods, floating discs, and carefully balanced forms that seem ready to move. The design feels light because most of the nail remains open, while each element is connected through a simple visual structure.
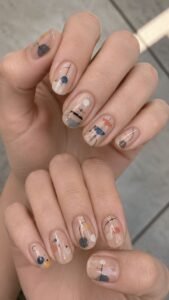
Sheer beige, cloudy white, smoke, cobalt, coral, and muted yellow create a playful but controlled palette. Short nails can carry one suspended pair, while longer shapes can show several levels without feeling crowded.
Balance Two Unequal Discs
Paint one fine horizontal line near the center and suspend a small disc from one end and a larger disc from the other. Keep the line slightly tilted so the shapes appear balanced through changing weight rather than perfect symmetry.
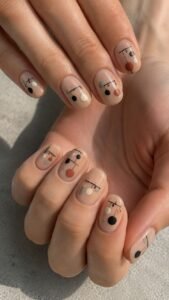
Repeat one disc color across the hand while changing the second shade. The open base around the structure gives the design air and makes every small difference in size easier to notice.
Join Levels With a Fine Hanging Thread
Add a narrow vertical line from one balance bar to another, placing the lower level slightly off center. Keep the connection delicate and stop it before reaching the cuticle or free edge.
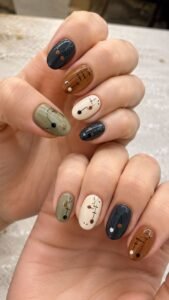
Use charcoal or cream for the thread depending on the base. On an accent nail, allow the lower bar to turn in a different direction. This creates the illusion that the mobile has shifted while the hands move.
Cast a Transparent Moving Shadow
Place a soft translucent version of one disc slightly beside or below the solid shape. Smoke gray, pale violet, or diluted blue can create the shadow without covering the base.
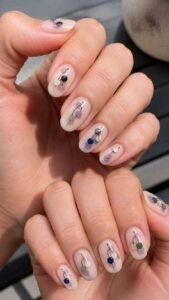
Keep every shadow in the same general direction across both hands so the lighting feels consistent. Use the full shadow effect on only two or three nails, allowing the remaining mobiles to stay crisp and minimal.
Bismuth Crystal Nails With Angular Color Steps
Bismuth crystal nails use stepped geometric surfaces that reflect changing pink, blue, green, gold, and violet tones. The manicure captures that structure through nested corners and thin transparent color rather than rough physical texture.
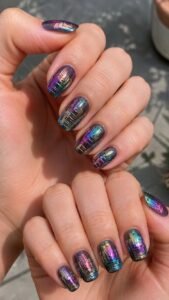
The style looks bold on square nails because the angles echo the free edge, while almond and oval shapes create an interesting contrast. Use a smoky or deep neutral base so the colored steps remain clear.
Build a Stair Step Spiral
Begin with a small angular path near one side and expand it outward through several square turns. Keep the spacing even and let the largest section disappear beyond the nail edge.
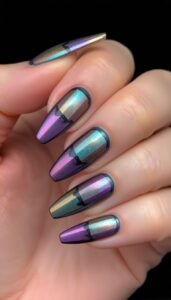
Use violet, teal, rose, and amber in a repeated order or keep the lines metallic against a sheer dark base. Change the starting point across the hand so every spiral feels like a different crystal face.
Shift Color at Every Corner
Paint each straight segment in one transparent shade, then change the color whenever the path turns. The meeting points should overlap slightly so a deeper tone appears at each corner.
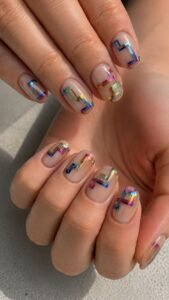
Keep the individual bands narrow and allow the base to show between neighboring steps. This method creates iridescent depth through thoughtful color placement rather than chrome, magnetic polish, or glitter.
Darken One Interior Channel
Choose one recessed path inside the crystal and fill it with charcoal, deep plum, or midnight green. Add a slim pale highlight along the opposite edge to make the channel appear deeper.
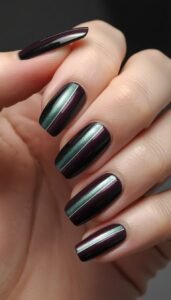
Move the dark section to a different level on each accent nail. The shadow gives the stepped pattern a sculpted illusion while the final surface remains completely smooth and practical.
Encaustic Pigment Nails With Waxy Color Veils
Encaustic pigment nails build color through cloudy layers, embedded marks, and areas where earlier pigment remains visible. The style becomes a soft arrangement of translucent polish, muted color, and gently buried linework.
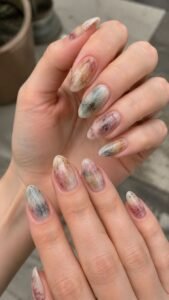
Cream, dusty rose, mineral green, tobacco, faded blue, and warm gray create an artistic palette that works through every season. The slight variation between nails is part of the beauty, making regular or gel polish equally suitable.
Float One Clouded Color Field
Apply a translucent patch across part of the nail, keeping the center richer and the edges soft. Add another related shade nearby without fully blending the two fields.
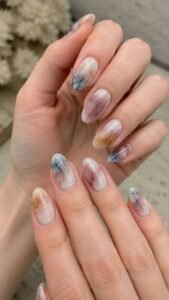
Leave clear or milky space around the color so the surface does not resemble a complete gradient. Changing the patch size across the hand creates a collected appearance while the repeated palette keeps everything calm.
Bury a Fine Mark Beneath the Veil
Paint a small curve, cross, number fragment, or abstract line in a muted dark shade, let it dry, then cover part of it with a sheer color layer. The mark should remain visible but softened, as though suspended inside wax.
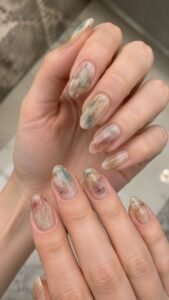
Use complete symbols sparingly and favor cropped or interrupted lines. This buried detail rewards a closer look without turning the manicure into readable lettering.
Scrape Back One Pale Opening
Create a narrow irregular opening through the colored field using the base shade, revealing a lighter layer beneath. Keep one edge sharp and soften the opposite edge with a nearly dry brush.
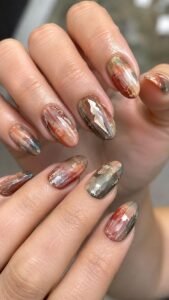
Add two tiny pale flecks near the opening so it appears naturally worn. Use the full scraped effect on one accent nail and smaller breaks elsewhere to keep the style varied.
Luthier Rosette Nails With Concentric Inlay
Luthier rosette nails use narrow bands of wood color, shell tones, and geometric pattern to create elegant circular structure. Walnut, maple, cream, black, turquoise, and muted red provide rich detail without depending on flowers or ordinary rings.
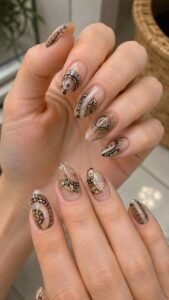
Cropped rosettes work especially well because the complete circle can appear to extend beyond the nail. Short shapes can show one curved fragment, while longer nails provide space for several delicate bands.
Curve Several Inlay Bands From One Side
Paint three or four close arcs entering from the side wall or free edge, allowing the widest curve to disappear beyond the nail. Use warm brown, cream, and one darker line to separate the bands.
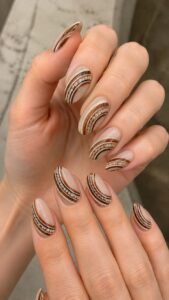
Keep each arc consistent in width and adapt the amount shown to the nail shape. The cropped placement makes the design feel larger while leaving the opposite side open and wearable.
Insert a Miniature Mosaic Channel
Fill one narrow band with tiny alternating blocks in cream, black, turquoise, or muted red. Keep the pieces equal in height but vary their color order across the fingers.
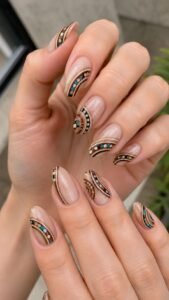
Use the complete channel on two accent nails and only a short fragment on the others. This approach gives the rosette handcrafted detail without covering the full surface in mosaic pattern.
Reveal a Dark Sound Opening
Place a deep brown or black curved section inside the smallest arc, leaving a slim highlight along one edge. The opening should look like part of a larger circle rather than a centered dot.
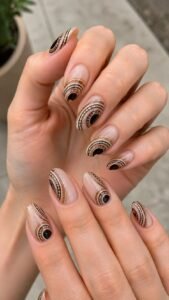
Shift its position slightly across selected nails while keeping the surrounding bands related. A glossy finish over the dark area and satin over the inlay can create convincing material contrast.
Mezzotint Nails With Smoky Engraved Light
Mezzotint nails use rich dark fields, dense stippling, and carefully revealed highlights to create dramatic tonal depth. Charcoal, ink blue, sepia, cream, and muted lavender work beautifully together.
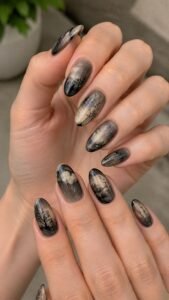
The style remains wearable when the image is cropped and the lightest area stays small. Short nails can hold one illuminated fragment, while longer shapes can show a fuller transition from deep shadow to softened light.
Build a Dense Velvet Background
Start with a dark base and add tiny closely spaced marks in a slightly lighter shade. Concentrate the texture near one edge and reduce it toward the center so the surface feels deep rather than flat.
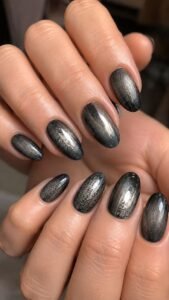
Keep the marks irregular and avoid forming a visible dot pattern. A satin finish can strengthen the soft engraved appearance, while a glossy accent can be reserved for one highlighted area.
Reveal a Pale Shape From Darkness
Paint a cream or smoky gray form that appears to emerge from the dark field. A folded arc, rounded vessel, abstract hand shape, or curved architectural fragment can provide the central image.
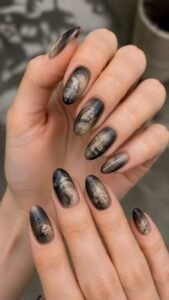
Blend its outer edge through several intermediate tones instead of using a hard outline. Keep the brightest point small and place it on the same side across both hands so the imagined lighting remains believable.
Cross the Shadow With Fine Hatching
Add several delicate parallel lines through part of the darker area, then interrupt them as they approach the pale form. Change the line length rather than the spacing, creating a controlled transition.
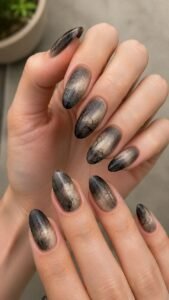
Use dark plum over charcoal or gray over ink blue for a subtle effect. The hatching introduces engraved structure while preserving the smoky softness that defines the overall style.
Choose the Nail Style That Feels Like Your Own Discovery
The strongest nail styles combine a distinctive craft language with thoughtful spacing, color, and finish. Eggshell lacquer brings delicate ivory fragments, while kinetic mobiles introduce suspended balance. Bismuth crystals create angular color steps, encaustic pigment adds cloudy layered depth, and luthier rosettes turn concentric inlay into wearable detail.
Mezzotint completes the collection with dark tonal drama and softly revealed light. Choose the style that fits your nail length and daily routine, then simplify it through fewer accent nails or a quieter palette when needed.
Related inspiration for nail colors, nail shapes, nail art, nail tips, regular polish designs, extensions, stickers, manicure care, and outfit styling can help you build a complete look around the finished set.
