
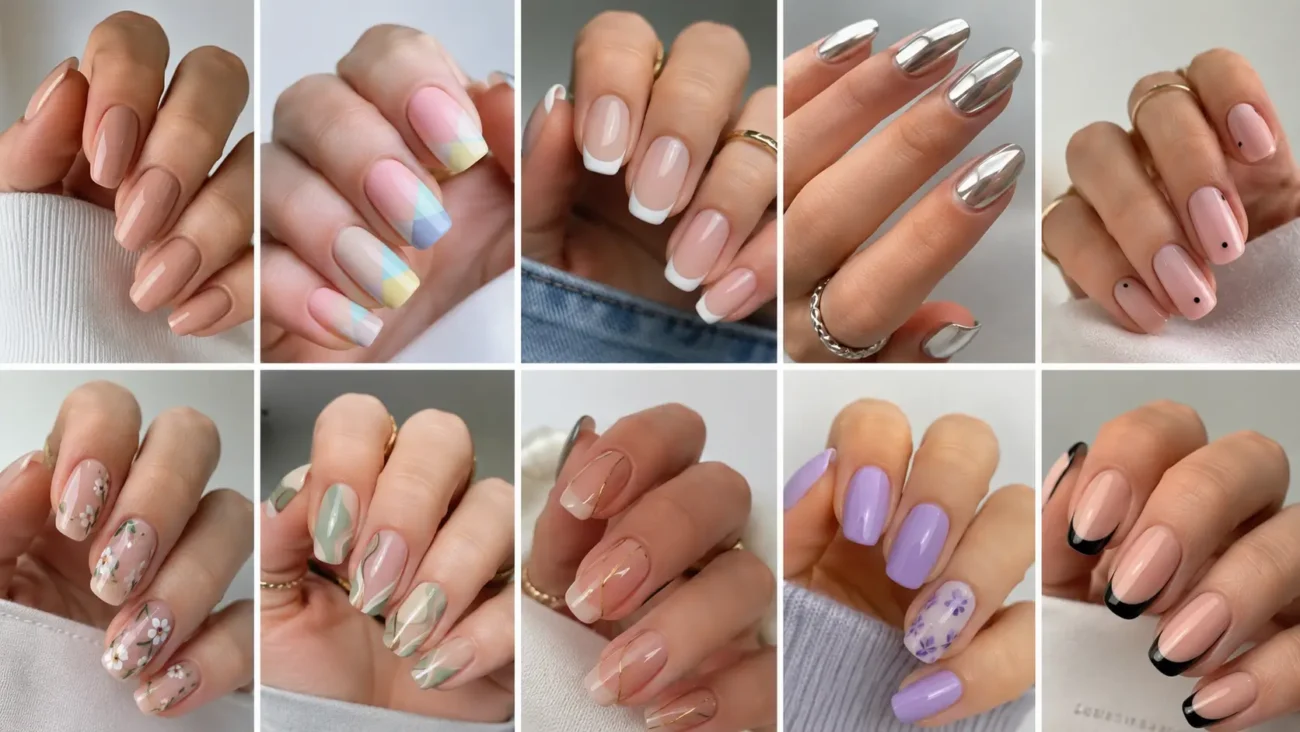
Nail art ideas feel most original when a manicure begins with one clear visual reference and develops it through color, spacing, texture, and finish. The designs below explore Fresnel lenses, player piano rolls, inflatable objects, workshop pegboards, barcode scanners, and racquet strings. Choose one complete story or reduce it to a few accent nails for a quieter result.
Fresnel Lens Nails With Concentric Light Patterns
Fresnel lens nails take inspiration from circular ridges that bend and concentrate light. The repeating arcs create movement without ordinary swirls, while transparent polish makes the pattern appear deeper than the surface.
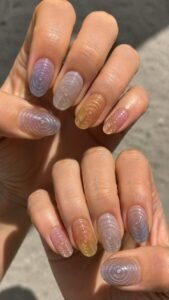
Clear, smoke, pale blue, amber, and violet work especially well. Short rounded nails suit cropped lenses, while almond and oval shapes allow expanding rings.
Build Fine Rings From One Side
Begin the smallest circle near one outer edge, then add narrow rings that spread across the nail in even intervals. Allow the largest arcs to disappear beyond the opposite side so the lens looks larger than the manicure.
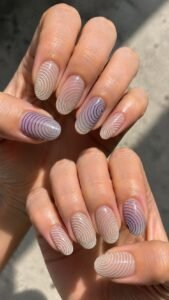
Use a clear base with white lines for a clean result or cobalt rings over smoky gray for stronger contrast. Consistent line thickness gives the design its optical character.
Shift the Focal Point Across the Hand
Move the center of the lens to a different location on each decorated nail. One focal point can sit near the cuticle, another near the tip, and a third partly outside the side wall.
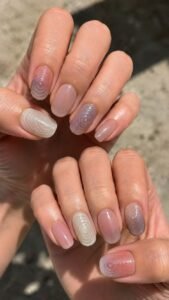
Repeat the same palette so the changing placement feels intentional. Solid translucent nails between the accents make every ring easier to notice.
Add One Refracted Color Slice
Place a narrow wedge of transparent color across part of the rings as though light has split inside the lens. Magenta moving into violet or yellow moving into green creates brightness without covering the pattern.
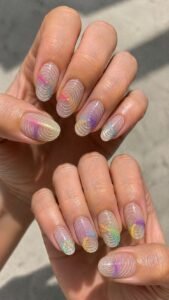
Keep the remaining area clear or softly tinted. A glossy seal strengthens the illusion that the color is suspended inside a polished optical surface.
Player Piano Roll Nails With Punched Musical Rhythm
Player piano roll nails use paper strips, punched openings, guide marks, and changing columns to create a musical design without ordinary notes or sound waves. Cream, black, faded red, tobacco, and muted blue give the concept a vintage mechanical mood.
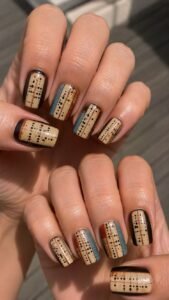
Short square nails suit compact strips, while longer shapes can show a fuller roll.
Arrange Punched Columns in Changing Gaps
Paint a parchment colored strip through the center, then add tiny rectangular openings in staggered columns. Change the distance between the marks so each nail suggests a different rhythm.
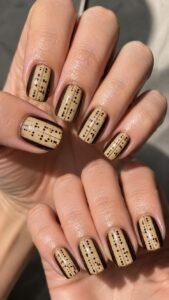
Black openings look crisp, while dark brown creates a softer aged effect. Leave a slim border around the strip so the background polish remains visible and the paper shape stays clear.
Trace a Red Timing Line
Add one fine red line beside the punched pattern, keeping it straight and slightly away from the center. The strong color gives the neutral design a visual anchor.
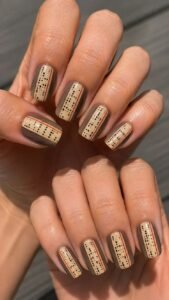
Move the line from the left side to the right side on different fingers while preserving the same width. Satin paper beside a glossy background creates subtle contrast.
Curl the Paper Edge Near the Tip
Create a small curved section near the free edge that appears to lift or roll forward. Use shading rather than a bulky raised piece so the manicure stays comfortable.
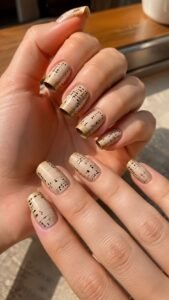
A darker line beneath the curl suggests depth, while one missing punch near the bend makes the strip feel used. Reserve this effect for one accent nail and keep nearby rolls flatter.
Inflatable Form Nails With Rounded Gel Structure
Inflatable form nails turn soft furniture and air filled objects into sculptural gel art without repeating ordinary droplets. Rounded tubes, pinched seams, and small valve details create the effect.
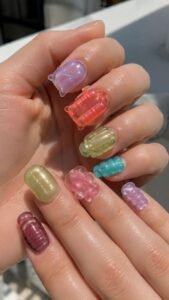
Transparent coral, lime, lavender, and aqua feel playful, while beige and burgundy look more editorial.
Shape Low Tubes Around the Perimeter
Build a smooth raised tube that follows part of the nail edge, leaving the center open. The form can curve around the cuticle on one finger and travel along the side on another.
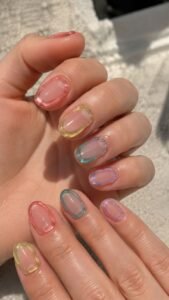
Keep the height low and the surface rounded so it resembles an inflated border rather than heavy decoration. Transparent color keeps the base visible.
Pinch a Seam Through the Center
Create two soft gel sections that meet along one narrow line, suggesting material sealed after filling. Place the seam vertically on a long nail or diagonally across a compact shape.
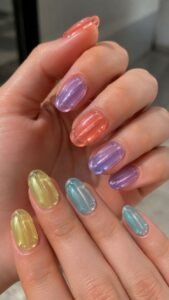
Use the same color on both sides and let shadow reveal the division. A tiny glossy highlight makes the form look smooth, flexible, and full of air.
Add a Mini Valve Detail
Place one small circular valve near the side or free edge of an accent nail. Build it from a low ring with a darker center, then repeat only a tiny dot on nearby fingers. The detail should appear functional rather than decorative.
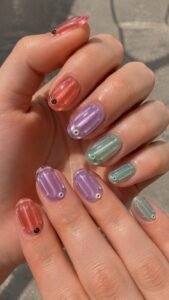
Contrasting colors such as black over coral or cream over violet make the reference clearer without overwhelming the surface.
Workshop Pegboard Nails With Organized Color
Workshop pegboard nails transform perforated panels, movable pegs, and hanging outlines into a manicure built around tidy spacing. Cream, olive, orange, navy, gray, and red create a practical graphic palette.
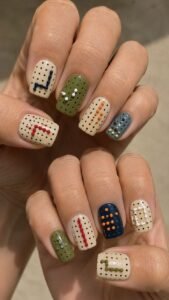
Short square and squoval nails keep the grid clear, while longer nails can carry several rearranged sections.
Map a Precise Perforation Grid
Cover the nail with tiny evenly spaced circles, leaving a narrow plain border around the edge. Use dark dots over a light base or reverse the contrast for a stronger result.
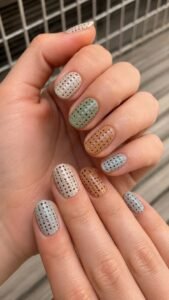
Every row should align vertically and horizontally, but selected openings can remain empty. A satin finish gives the panel a painted metal appearance.
Insert Bright Pegs Into Selected Openings
Add small raised dots in red, yellow, teal, or violet to a limited number of grid positions. Arrange them in a diagonal path, compact cluster, or simple abstract symbol.
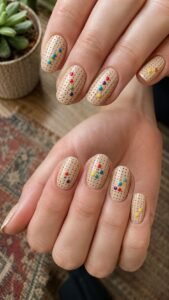
Repeat one peg color throughout the set so the different arrangements feel connected. Keeping most openings flat allows the raised pieces to stand out without excessive texture.
Outline One Hanging Tool Shape
Use a fine line to suggest the silhouette of a hook, clamp, handle, or simple workshop object across part of the grid. Avoid realistic shading and let the perforations remain visible inside the outline.
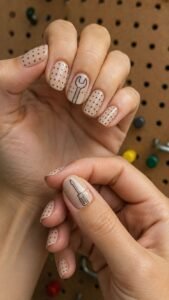
Change the object on each hand while using the same line color. One detailed nail is enough, with surrounding fingers focused on pegs and open holes.
Barcode Scanner Nails With Crisp Graphic Contrast
Barcode scanner nails use varied vertical bars, cropped numbers, and one moving beam of color to create a clean graphic manicure.
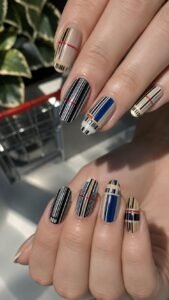
The lines change in width and spacing and include small coded details. Black, white, red, cobalt, and beige create sharp contrast, while gray and brown feel quieter.
Vary the Bar Width With Intention
Paint narrow and broad vertical bars in an uneven sequence, leaving precise spaces between them. Crop the pattern at the cuticle or tip so it feels taken from a larger label.
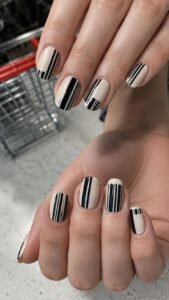
Keep some nails nearly full and use only four or five bars on others. A cream base softens black lines, while clear polish gives the design a lighter contemporary finish.
Sweep a Red Scan Beam Across Two Nails
Add one thin red line that crosses the barcode horizontally and continues onto the finger beside it. Align both sections when the hands rest naturally so the beam appears complete.
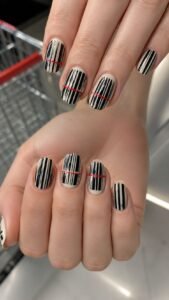
This changing reflection gives the scanner effect movement without glitter, gems, or extra decoration.
Place Cropped Digits Near the Side
Add two or three tiny number stickers or painted digits close to one side wall, allowing part of the sequence to disappear beyond the edge. Keep the characters decorative rather than connected to a real product.
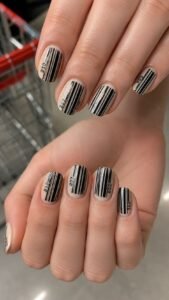
Black digits over beige feel understated, while white over charcoal creates drama. Seal them carefully so the small edges remain smooth.
Racquet String Nails With Tensioned Grid Detail
Racquet string nails draw from tightly woven strings, curved frames, and small vibration dampeners. The concept feels sporty without repeating jerseys, racing stripes, or game boards.
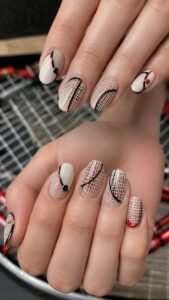
Oval and almond nails support the curved frame, while square shapes make the internal grid especially precise.
Stretch a Fine Crossed String Grid
Paint narrow vertical lines first, then cross them with horizontal lines at consistent intervals. Let the grid cover only the center so a border of base color remains visible.
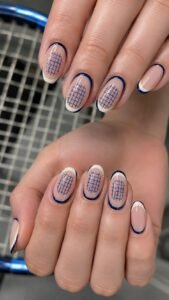
White strings over cobalt look energetic, while charcoal over clay feels refined. Keep every line delicate because an oversized grid can make the nail appear crowded.
Curve a Frame Around the Outer Edge
Add a smooth border that follows the nail perimeter and thickens slightly near the tip. Leave a small gap near the cuticle so the frame does not resemble a standard outline manicure.
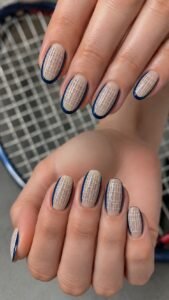
Use one strong color for the frame and a quieter tone for the grid. The curved border gives the linework structure.
Place One Dampener at the Sweet Spot
Add a tiny rounded triangle, circle, or capsule at the lower center of the string grid. Use a contrasting color such as red over white strings or lime over charcoal. Shift the piece slightly on selected fingers while keeping it within the central grid.
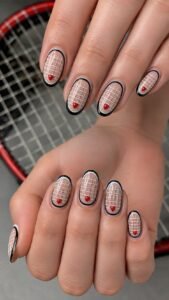
A low raised gel detail can add dimension while remaining comfortable for daily wear.
Choose the Nail Art Idea That Feels Entirely Your Own
The strongest nail art ideas combine one recognizable source with controlled color, scale, and placement. Fresnel lenses bring optical rings, while player piano rolls create rhythm through punched patterns. Inflatable forms introduce rounded gel structure, workshop pegboards organize bright color, and barcode scanners add crisp contrast. Racquet strings finish the collection with tensioned linework and compact sporting details. Choose the idea that suits your nail length and routine, then simplify it with fewer accent nails when needed. Related inspiration for nail colors, nail shapes, extensions, stickers, manicure care, and outfit styling can help you build a complete look around the finished set.
