
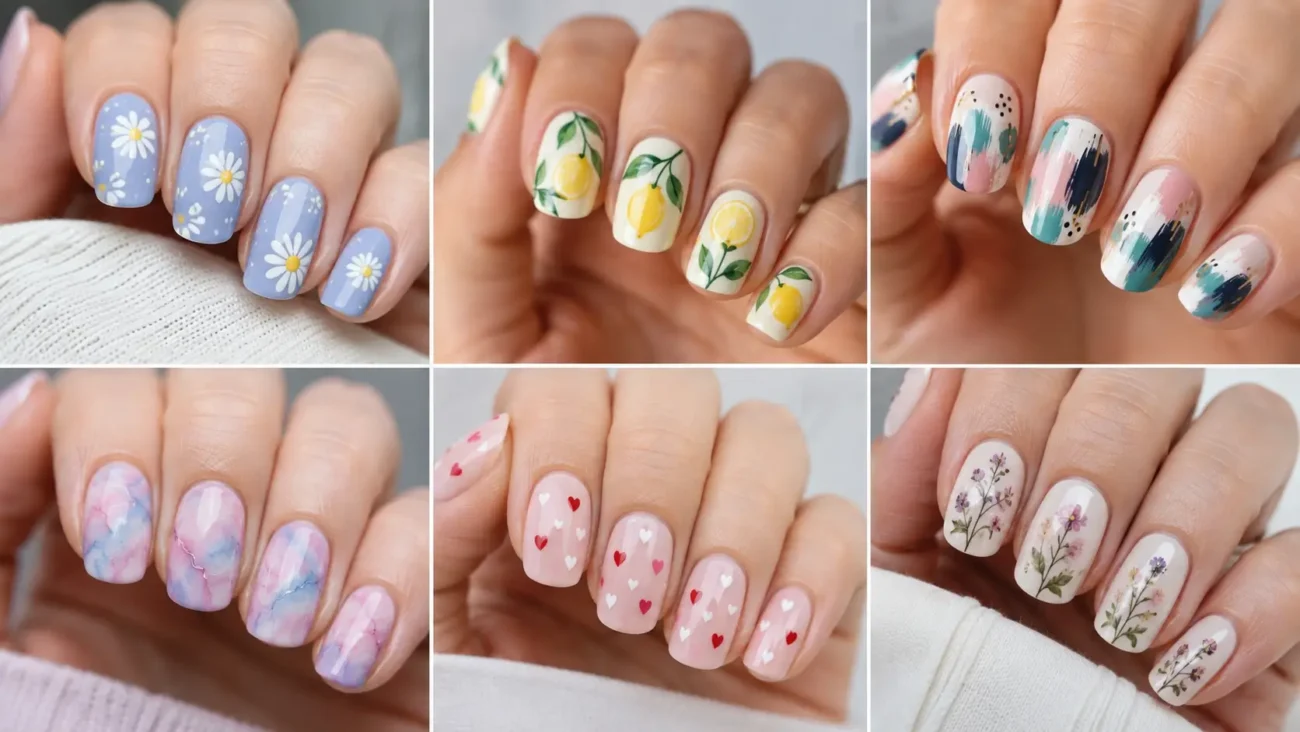
Nail painting ideas can turn even a simple manicure into a carefully styled part of your overall look. The most effective designs begin with a clear visual direction, then use color, line, shape, and surface detail to bring that concept to life. You can explore expressive brush marks, delicate lace patterns, painted shadows, technical drawings, quilt inspired arrangements, editorial lettering, or graphic print effects. Each direction below includes three distinct variations that can be adapted for short natural nails, medium almond tips, rounded shapes, or longer extensions. These ideas focus on painted artistry rather than bulky decoration, helping every manicure feel creative, polished, and personal without becoming crowded or difficult to coordinate with outfits.
Artist Brushstroke Nails With Visible Painted Movement
Artist brushstroke nails celebrate the natural movement of polish instead of hiding every mark beneath perfectly smooth blocks of color. Fine bristle lines, unfinished edges, and layered paint create the appearance of a miniature canvas. The design works best when two or three colors are used with plenty of open background around them. Short rounded nails create a compact art study, while longer oval nails provide room for wider strokes and more visible changes in direction.
Vermilion Bristle Sweeps
Apply a pale sand base and use a nearly dry brush to sweep vermilion polish diagonally across each nail. Allow the bristle lines to remain visible instead of filling every gap. Add a smaller burgundy stroke beside selected marks to deepen the movement. Change the direction from nail to nail so the set feels connected without appearing copied. A clear glossy finish will intensify the red tones while preserving the expressive texture underneath.
Cobalt Palette Scrapes
Begin with a soft gray base and drag cobalt blue polish across the nail using the flat side of a small brush. The color should appear denser at the starting point and thinner toward the opposite edge. Add one narrow streak of chalk white through selected blue areas. Keep two nails more minimal than the others so the strongest scrapes remain the focus and the complete manicure retains a balanced appearance.
Moss and Lilac Dry Layers
Paint a translucent beige background and place dry moss green strokes close to the outer edges. Add muted lilac across the center without fully covering the first color. The overlapping areas should create an irregular woven effect while remaining flat and smooth. This palette feels artistic without becoming overly bright, making it suitable for cream clothing, denim, brown accessories, soft purple outfits, and relaxed neutral styling.
Painted Lace Nails With Fine Openwork Detail
Painted lace nails use delicate lines, curved openings, and repeated ornamental shapes to create a fabric inspired finish. The artwork can cover one corner, form a narrow band, or appear as a single central motif. A fine detailing brush is essential because the spaces between the painted lines are just as important as the lines themselves. Keep the background simple so the lace pattern remains readable and does not compete with additional decoration.
Ink Black Corner Lace
Use a translucent blush base and paint black scalloped lines across one corner of each accent nail. Add tiny loops and narrow connecting curves inside the border, leaving the remainder of the nail clear. Position the lace on alternating sides across the hand to create visual movement. Short square nails make the contrast feel graphic, while oval nails soften the dark detail and give it a more romantic appearance.
Ivory Eyelet Bands
Apply a muted powder blue base and paint one narrow ivory band across the middle of selected nails. Add miniature oval openings inside the band, then surround them with tiny curved marks that resemble stitched eyelets. Keep the band straight on square shapes or slightly curved on almond nails. The combination of cool blue and warm ivory creates a fresh result that feels detailed without requiring dark outlines or sparkling accents.
Cobalt Crochet Medallions
Start with a warm cream background and paint one circular cobalt motif near the center of two accent nails. Build the design with small loops, radiating lines, and open spaces so it resembles a delicate crochet medallion. Add partial motifs near the edges of the remaining nails rather than repeating the complete circle. This placement creates variety while keeping the rich blue and cream palette consistent throughout the manicure.
Optical Shadow Nails With Painted Depth Illusions
Optical shadow nails use carefully placed highlights and darker edges to make flat painted shapes appear raised above the surface. The illusion depends on keeping the imagined light direction consistent across every nail. A bright shape, a narrow shadow, and a small highlight are usually enough to produce believable depth. This technique creates visual interest without adding physical thickness, making it practical for people who prefer smooth nails with unusual artistic detail.
Floating Coral Tile Shapes
Paint the nails in a pale oatmeal shade and add small coral squares near different corners. Place a narrow taupe shadow beneath the same side of every square, leaving a thin line of background between the shape and its shadow. Add one tiny cream highlight along the upper edge. The completed tiles will appear to float slightly above the nails while maintaining a clean, colorful, and modern composition.
Folded Satin Ribbon Illusions
Choose a dusty mauve base and paint wide ribbon shapes in deep plum. Use a lighter pink along the upper curves and a darker aubergine shade where the ribbon appears to fold underneath itself. Allow each ribbon to enter and leave the nail at different points. Medium almond nails support the flowing movement, while the carefully painted light and shadow create depth without relying on raised gel or attached embellishments.
Painted Glass Marble Spheres
Apply a charcoal gray background and paint one small translucent looking sphere on selected nails. Begin with a muted aqua circle, deepen one edge with navy, and place a curved white highlight near the opposite side. Add a soft painted shadow underneath the sphere to complete the illusion. Keep the surrounding nails simple with partial circles or tiny curved highlights so the set remains coordinated rather than excessively detailed.
Blueprint Nails With Technical Drawing Details
Blueprint nails transform measurement marks, compass curves, construction lines, and diagram inspired shapes into precise miniature artwork. A deep blue, graphite, or muted teal background creates a drafting paper effect, while white, silver, or copper lines provide contrast. The artwork should appear organized but not identical on every nail. Combining complete diagrams with partial line fragments will keep the manicure visually interesting and prevent it from looking like one repeated pattern.
White Compass Arc Drawings
Paint the nails in deep blueprint blue and add thin white arcs that overlap at different angles. Include small center points and short radius lines to suggest compass drawn construction. Keep one or two nails limited to a single curved section so the design has breathing room. Square and squoval shapes support the technical character, while a glossy finish makes the white linework appear crisp against the dark background.
Copper Measurement Markings
Use a matte graphite colored base and paint narrow copper lines along the length of selected nails. Add tiny measurement ticks at irregular intervals, followed by small circles or angled indicators. Avoid using actual numbers so the artwork remains decorative rather than literal. The warm copper stands out against the dark base and gives the technical theme a more luxurious quality without introducing crystals, chains, or reflective powder.
Cutaway Shape Panels
Begin with a muted teal background and divide each accent nail into several outlined sections using fine cream lines. Paint one section in rust, one in pale blue, and leave the remaining areas teal. Add small arrows or curved guide marks around the colored panels. The result resembles a cutaway design drawing, giving the manicure a structured appearance that works particularly well with tailored clothing and simple geometric accessories.
Quilted Color Nails With Painted Fabric Structure
Quilted color nails use connected panels, painted seams, and carefully chosen fabric inspired palettes. Unlike a standard checker pattern, every section can have a different scale, direction, or curved edge. The goal is to create the impression of assembled material while keeping the surface completely flat. Warm neutrals offer a traditional feeling, while unexpected colors such as orchid, petrol, persimmon, and pistachio make the concept brighter and more contemporary.
Persimmon Diamond Panels
Apply a warm cream base and paint elongated diamonds in persimmon orange across selected nails. Outline only two sides of each diamond with muted brown to create the appearance of folded fabric seams. Add smaller cream diamonds inside a few of the orange shapes. Keep the layout spacious so the color remains bold without covering every part of the nail. Medium oval tips allow the diamond arrangement to flow naturally.
Orchid Patchwork Windows
Divide each nail into three or four uneven panels using fine plum lines. Fill selected sections with orchid purple, pale rose, and smoky lilac while leaving one area transparent. Change the panel arrangement across every finger, but repeat the same palette. The transparent sections prevent the patchwork from appearing heavy, while the purple tones create a polished design that complements silver accessories, dark clothing, and soft neutral outfits.
Pistachio Curved Seam Channels
Use a pale pistachio base and paint wide curved channels in deeper olive green. Place a thin cream line beside each green curve to suggest a carefully stitched seam. Let the channels move vertically on some nails and diagonally on others. The curved construction distinguishes this design from ordinary square patchwork and creates a softer appearance that works beautifully on rounded, almond, and softly tapered nail shapes.
Editorial Letter Nails With Fashion Inspired Typography
Editorial letter nails use fragments of words, oversized characters, and handwritten marks as graphic design elements. The lettering does not need to form a complete message across every nail. A partial letter can create more impact than a crowded phrase, especially on short nails. Keep the font style consistent within the set and limit the palette to two or three shades so the typography remains clear, stylish, and easy to coordinate.
Oversized Serif Fragments
Paint a pale stone background and add large black serif letter fragments that extend beyond the edges of each nail. One nail may show the curve of a letter, while another displays only a vertical stem or angled foot. The incomplete placement makes the design feel editorial rather than literal. Add one muted red fragment on an accent nail to create contrast without interrupting the strong black and neutral composition.
Cursive Ink Trails
Use a translucent pink beige base and paint thin navy cursive lines that travel across the nails like handwritten notes. The writing can remain abstract, with loops, connections, and partial characters rather than readable sentences. Change the placement and size of the marks across every finger. A glossy finish gives the navy ink greater depth and helps the delicate lines remain visible against the soft natural background.
Stacked Initial Blocks
Choose two or three initials and paint them inside compact rectangular blocks near the center of selected nails. Use combinations such as cream lettering on forest green, burgundy lettering on blush, or black lettering on powder blue. Rotate the blocks slightly to avoid a rigid arrangement. Keep the other nails simple with narrow border shapes so the lettering remains the strongest visual element in the complete set.
Woodcut Print Nails With Bold Carved Line Effects
Woodcut print nails recreate the appearance of carved illustrations using thick outlines, repeated grooves, and intentionally imperfect filled areas. The artwork should feel strong and handmade rather than delicate or digitally precise. Black and cream provide dramatic contrast, but terracotta, forest green, mustard, and navy can create softer variations. Use a fine brush for the internal lines and a slightly wider brush for the larger printed shapes.
Black Carved Wave Blocks
Paint a warm ivory base and add solid black wave shapes across two or three nails. Draw several narrow ivory lines inside each black area so they resemble grooves cut into a printing block. Change the width and direction of the waves across the set. The bold contrast works well on short nails because the shapes remain easy to see without requiring a large surface or complex decoration.
Terracotta Sun Arch Prints
Apply a pale sand background and paint large terracotta arches near the tips or sides. Add straight cream rays inside the arches, keeping the spacing slightly irregular. Use partial arch fragments on the remaining nails to maintain continuity. The earthy palette gives the graphic print a warm character, while the simple shapes allow it to pair naturally with linen textures, denim, brown leather, and muted green clothing.
Forest Green Stair Step Marks
Begin with a soft beige base and paint forest green stair step shapes moving diagonally across the nails. Add fine beige grooves inside the green areas to create a carved appearance. Introduce one small rust colored block on two accent nails for controlled contrast. Square nails emphasize the stepped structure, while oval shapes soften the geometry and make the same pattern appear more organic and relaxed.
Paint a Manicure That Feels Completely Personal
The most successful nail painting ideas begin with one strong concept and allow every detail to support it. Visible brush marks bring artistic energy, lace painting introduces delicacy, and optical shadows create unexpected depth on a smooth surface. Blueprint drawings offer precision, quilt inspired panels add color structure, editorial lettering creates a fashion focused statement, and woodcut patterns deliver bold graphic character. Select the idea that suits your preferred nail length, wardrobe, and level of detail, then adjust the colors to make it your own. Continue exploring related nail art, nail color, manicure, beauty, and styling articles to discover even more combinations for your next distinctive look.
