
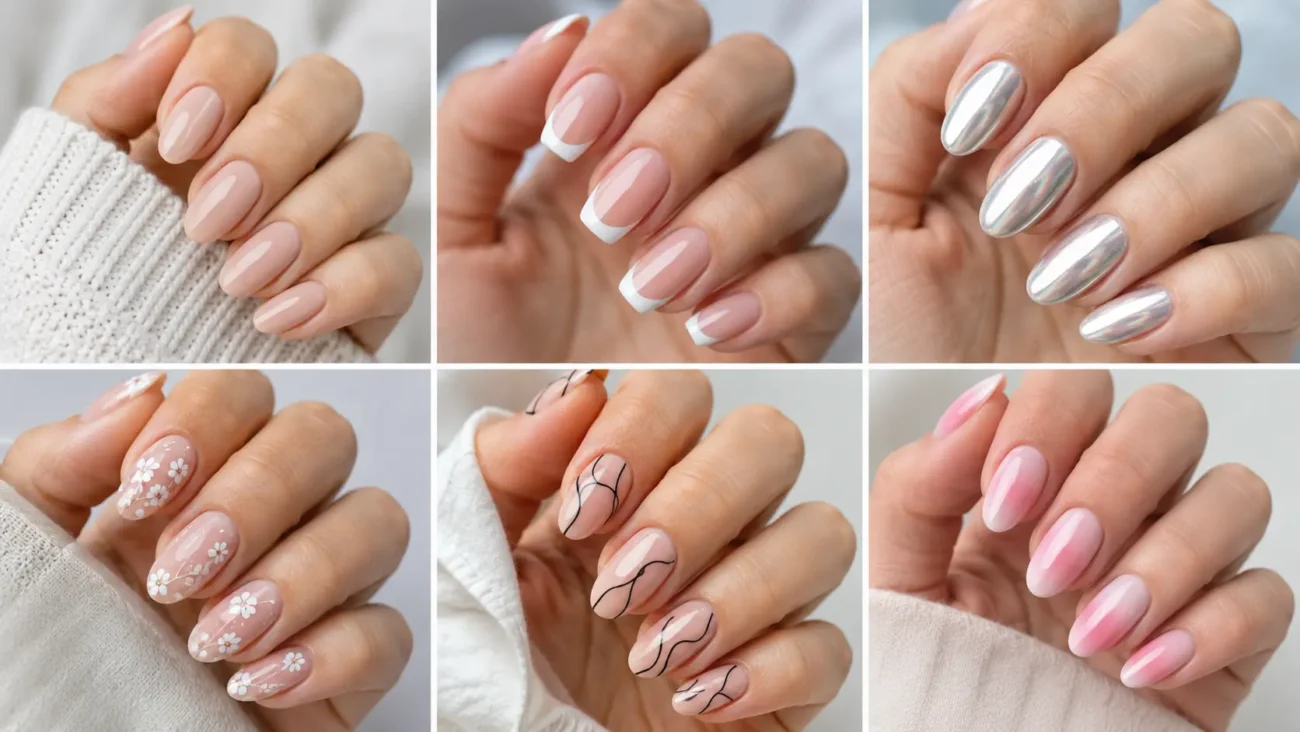
A thoughtful nails design can give the hands a recognizable personality while completing an outfit with color, texture, and carefully placed detail. Sheer polish, glossy surfaces, miniature graphics, low raised gel, soft fabric effects, and clean geometric spacing allow creative manicures to remain stylish without feeling crowded.
The ideas below move beyond familiar flowers, hearts, cherries, flames, clouds, French tips, marble, chrome, aura centers, animal prints, bows, and glitter fades. Instead, they explore bubble wrap, matchbook covers, metro maps, telescope lenses, quilted jackets, and music boxes. Each theme includes three distinctive variations that can be adapted for short square, rounded, oval, or almond nails.
Bubble Wrap Nails With Clear Raised Texture
Bubble wrap nails transform transparent gel into rounded cells that catch light whenever the hands move. Clear, milky pink, pale blue, lime, and soft violet can make the raised pattern feel playful while maintaining a clean modern finish. Short square nails naturally support compact rows, while oval and almond nails can carry curved clusters that travel across the surface.
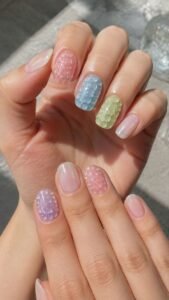
Keeping several fingers smooth creates enough contrast for the transparent texture to remain noticeable without making the complete manicure feel heavy.
Build Clear Cells Over Milky Pink
Begin with a smooth milky pink base, then place six low clear gel circles across one accent nail. Arrange them in two slightly uneven rows and change the size of one or two cells so the surface appears formed rather than mechanically printed.
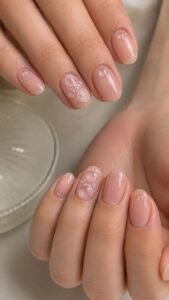
Add a narrow white reflection inside selected circles, then keep nearby nails glossy pink with only one raised cell near the cuticle to connect the design.
Cluster Colored Bubbles Near One Side
Apply a clear foundation and create a small group of transparent bubbles near the outer side of the nail. Tint individual cells with pale blue, soft violet, and watery lime while leaving several completely clear so the cluster remains light and airy.
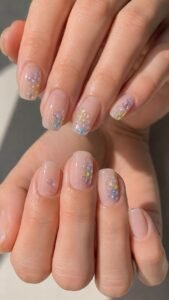
Allow two bubbles to overlap slightly, then repeat one isolated colored cell on another finger while the remaining nails stay sheer.
Leave One Popped Bubble Open
Paint the nails with a translucent beige base and add several low clear circles across the center of an accent nail. Leave one cell open by drawing only an irregular glossy outline, then place a tiny clear gel drop beside it to suggest a recently released pocket of air.
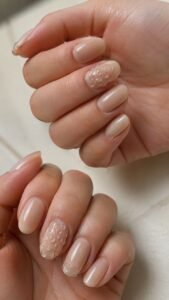
Repeat the broken outline near the tip of another finger, while smooth beige nails balance the unusual raised texture.
Matchbook Cover Nails With Bold Graphic Edges
Matchbook cover nails use compact rectangles, striking strips, folded corners, and simple printed shapes to create a manicure with strong graphic character. Cherry red, mustard cream, dusty blue, forest green, and charcoal provide enough contrast for the small details to remain clear.
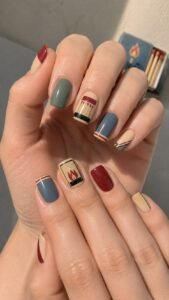
Square nails naturally suit the rectangular covers, while rounded nails can carry cropped sections entering from the side. One complete matchbook on each hand establishes the theme, while simpler surrounding nails prevent the concept from looking overly literal.
Add a Cherry Striking Strip Along the Tip
Apply a warm cream base and paint one cherry red rectangle across most of an accent nail. Add a narrow textured strip near the tip using deeper red and tiny cream speckles, keeping the marks irregular enough to resemble a striking surface.
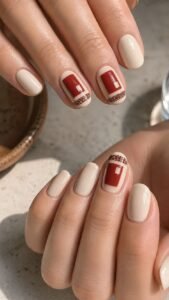
Place one small cream frame inside the red section, then repeat only the speckled strip on another nail to continue the graphic color story.
Stack Dusty Blue Covers at Different Angles
Begin with a sheer nude foundation and paint two small dusty blue rectangles at slightly different angles. Add a thin white border around one cover and a muted green border around the other, leaving their centers mostly open for a clean printed appearance.
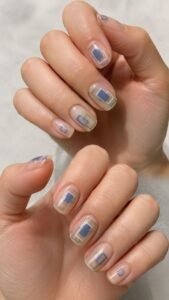
Overlap one corner lightly, then use a single cropped blue rectangle near the cuticle of another finger to make the arrangement feel collected rather than repeated.
Place a Charcoal Match Head Near the Edge
Paint the nails in muted mustard cream and add one narrow charcoal line beginning near the side. Finish the line with a small rounded shape in deep burgundy, creating the appearance of a match resting across the cover without filling the entire surface.
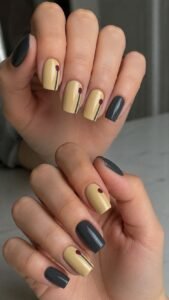
Use the complete detail once, then repeat only the burgundy circle on another mustard nail while solid charcoal fingers add balance.
Metro Map Nails With Curved Color Routes
Metro map nails combine narrow colored paths, small station circles, and carefully spaced intersections to create movement across the hands. Cobalt, coral, mint, plum, cream, and glossy black make the routes easy to follow while keeping the overall manicure polished.
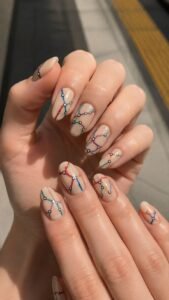
Short nails can carry one curved path and two station points, while longer almond nails provide space for several lines to cross. Changing the route direction on every accent keeps the design lively without losing its clear connected theme.
Curve a Cobalt Route Across Cream
Begin with a creamy beige base and draw one thin cobalt line that curves from the cuticle toward the opposite side. Place three small white circles along the route and outline one station with silver to create a subtle focal point.
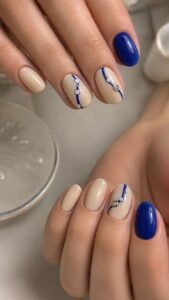
Continue the cobalt shade as a shorter line on another finger, while nearby nails remain cream or solid blue for a clean and wearable finish.
Connect Coral and Mint at One Station
Apply a sheer pink foundation and paint one coral route travelling diagonally across the nail. Add a mint line entering from the side and allow both colors to meet at one larger white circle near the center.
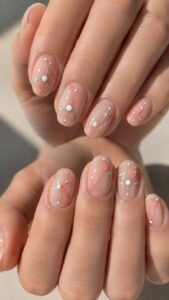
Keep the remaining station points smaller, then repeat either the coral or mint path alone on another nail so the interchange remains the strongest detail.
Frame a Plum Route With Black Markers
Paint selected nails in pale gray and add one narrow plum line that bends twice as it moves toward the tip. Place tiny glossy black points beside the corners, suggesting compact directional markers without forming readable symbols.
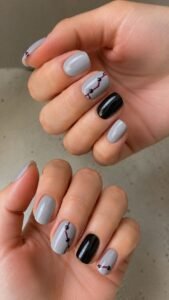
Use the complete route on one accent and a cropped plum section near the side of another, while solid gray and black nails support the city inspired palette.
Telescope Lens Nails With Deep Circular Light
Telescope lens nails use layered circles, smoky transparent color, reflective rings, and small focus marks to create a manicure with polished optical depth. Midnight blue, bottle green, violet, silver, black, and clear gel make the circular details appear deeper than the actual nail surface.
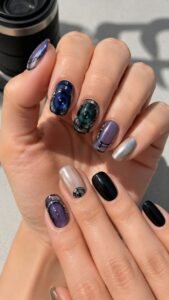
Rounded and oval nails naturally support complete lenses, while square nails can feature cropped rings entering from one corner. Limiting the complete lens to one or two fingers allows the darker colors to feel sophisticated rather than overwhelming.
Layer Midnight Blue Focus Rings
Apply a deep midnight blue base and paint three thin circles near the center using slightly different shades of blue.
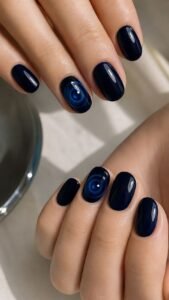
Keep the outer ring soft and the inner ring brighter, then add one tiny white reflection along the upper edge to create a curved glass appearance. Repeat one cropped blue ring on another nail while the surrounding fingers remain glossy midnight blue.
Set a Silver Lens Inside Smoke Gray
Begin with a translucent smoke gray foundation and place one brushed silver circle slightly away from the center. Add a smaller black circle inside it and cover the middle with clear gel so the surface looks smooth and reflective.
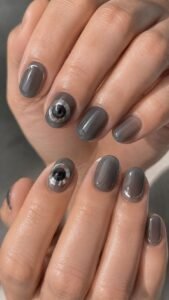
Use the complete silver frame on one accent, then repeat only a narrow metallic crescent near the cuticle of another finger for controlled continuity.
Shift Bottle Green Light Toward the Edge
Paint the nails with a deep bottle green base and create one transparent green circle entering from the side. Add a pale mint reflection along one edge and a slim charcoal ring around the opposite side, leaving part of the shape open.
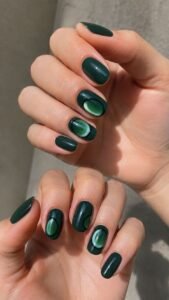
Repeat a smaller mint crescent on another finger, while solid green nails allow the layered lens to remain the focus.
Quilted Jacket Nails With Soft Padded Structure
Quilted jacket nails translate stitched panels, padded diamonds, snap buttons, and contrasting lining into a manicure with strong fashion character. Powder pink, olive, cream, black, cocoa, and brushed silver can make the texture feel soft, practical, or dramatic depending on the chosen palette.
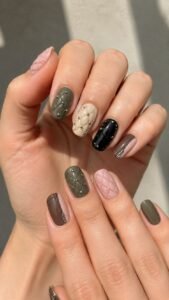
Square and rounded nails support compact quilted sections, while almond shapes allow longer channels to travel diagonally. Keeping the raised gel low preserves comfort while still giving the surface enough dimension to imitate softly padded fabric.
Raise Powder Pink Diamond Panels
Apply a creamy powder pink base and draw a loose diamond grid using slightly deeper rose lines. Place low clear gel inside selected sections so the panels appear gently padded without becoming bulky.
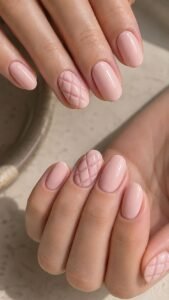
Keep one or two diamonds flat for visual variation, then repeat only a cropped padded corner on another finger while the remaining nails stay smooth pink.
Stitch Olive Channels With Cream Thread
Paint the nails in muted olive and create three diagonal channels across one accent using low raised gel. Add narrow cream lines between the sections so the details resemble visible stitching rather than ordinary stripes.
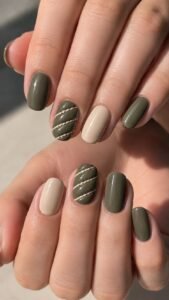
Reverse the angle on another finger, then use solid olive and warm cream across the remaining nails to keep the fashion inspired arrangement balanced.
Fasten a Silver Snap Over Cocoa
Begin with a rich cocoa base and place one small brushed silver circle near the cuticle. Add a thin embossed ring around the snap and create two short quilted seams extending from its lower edge.
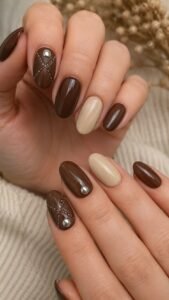
Repeat the silver circle alone on another cocoa nail, while one creamy beige finger introduces the appearance of a soft contrasting jacket lining.
Music Box Nails With Tiny Turning Details
Music box nails combine rotating cylinders, delicate winding keys, ivory panels, and small metallic points to create a manicure with gentle mechanical charm. Pale blue, dusty rose, cream, antique gold, and walnut brown give the theme a nostalgic appearance without requiring complicated illustrations.
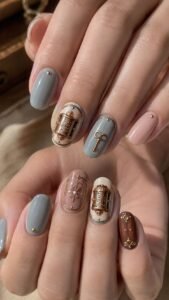
Short nails can hold one compact winding detail, while oval and almond shapes provide space for longer cylinders and curved motion lines. Mixing smooth color with a few low metallic accents keeps the manicure elegant and practical.
Turn an Antique Gold Winding Key
Apply a dusty rose base and paint one narrow antique gold stem near the outer side of an accent nail. Add two small loops at the end and one tiny circle where the stem appears to enter the surface, keeping the complete key delicate and flat.
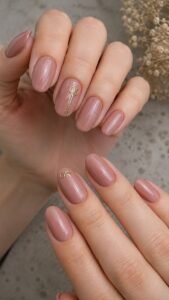
Repeat one gold loop near the cuticle of another finger, while glossy rose nails allow the winding detail to remain easy to see.
Build a Pale Blue Music Cylinder
Paint one nail with a creamy pale blue base and add a narrow silver rectangle across the center. Place several tiny gold points along the rectangle at irregular intervals, suggesting the raised pins of a turning music cylinder.
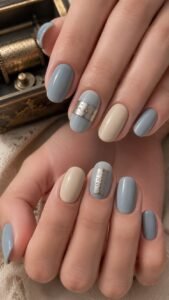
Add a soft gray shadow beneath one edge, then repeat a shorter silver panel on another finger while the remaining nails stay blue or cream.
Unroll an Ivory Melody Strip
Begin with a warm walnut brown foundation and place one curved ivory strip travelling from the cuticle toward the side. Add a series of tiny brown marks across the strip without forming readable notes or text, allowing the shapes to remain purely decorative.
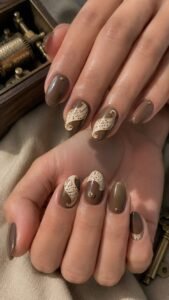
Curl the end slightly and add one muted gold point nearby, then use a cropped ivory corner on another nail to continue the paper inspired detail.
Make Your Next Nails Design the Detail Everyone Remembers
A memorable manicure becomes more interesting when every color, shape, and texture supports one clear visual idea. Bubble wrap introduces transparent raised cells, while matchbook covers bring compact graphic character. Metro maps create curved movement, telescope lenses add deep circular shine, quilted jackets offer soft fashion texture, and music boxes finish the collection with delicate mechanical details. Choose the concept that works with your nail length, personal wardrobe, and daily routine, then simplify or expand the artwork until the complete set feels original. You can also explore related articles about short nail designs, simple nail art, nail colors, manicure care, outfit inspiration, jewelry styling, hairstyles, and beauty ideas to complete your next look.
