
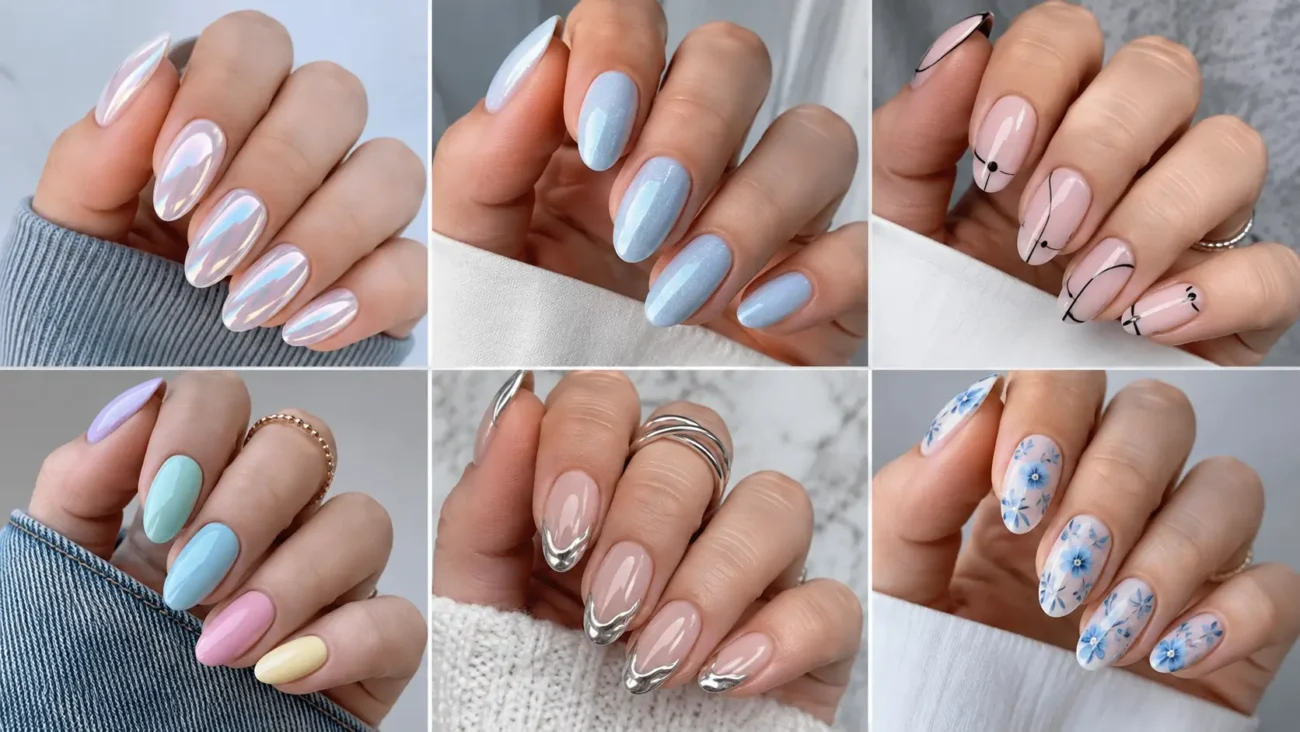
Nails inspo 2026 brings together artistic finishes, carefully controlled patterns, unusual materials, and expressive details that make a manicure feel personal. Instead of relying on one familiar look, these ideas explore diffused color, miniature hardware, light shifting film, refined beadwork, modern animal markings, contrasting surfaces, and curated charms.
Every concept can be adjusted for short natural nails, structured extensions, rounded tips, or dramatic lengths. The key is choosing one clear visual direction and allowing the shape, palette, and finish to support it. Whether you prefer subtle detail or a more noticeable statement, the following designs offer fresh ways to create a manicure that feels imaginative, polished, and visually memorable.
Controlled Bloom Nails With Flowing Ink Diffusion
Controlled bloom nails use spreading gel to create soft color movement without forming a traditional gradient or circular aura. Each mark develops organically, but careful placement keeps the final design balanced. Instead of covering the entire nail with several bright shades, place one diffused shape against a calm base and allow open space to frame it.
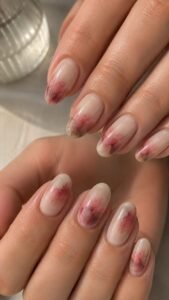
Rounded square and oval nails make the movement feel gentle, while longer almond tips can stretch the color into more dramatic formations.
Blueberry Ink Pools
Apply a translucent lavender gray base and place a small drop of blueberry blue blooming gel near one side of the nail. Allow the shade to spread before adding a darker indigo point inside it.
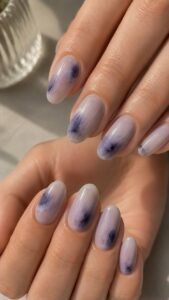
The two colors should create a soft pool with an irregular edge rather than a perfect circle. Repeat the technique in different positions across the hand, keeping several nails almost bare so the deepest blue areas remain noticeable.
Cantaloupe Smoke Rings
Begin with a warm cream base and create loose rings using cantaloupe orange and pale coral. Let the outer edge dissolve into the background while the inner portion remains slightly stronger. Add one tiny burgundy dot beside selected rings for contrast.
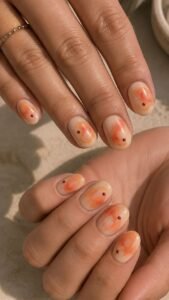
The design should resemble color drifting through water rather than a traditional flower. Short oval nails keep the warm pattern compact, modern, and easy to wear.
Sage Tea Diffusion
Use a sheer beige base with muted sage green spreading gently from the corners. Introduce a small amount of tea brown through the center of each green shape so the colors blend naturally. Keep the direction different on every nail, with some marks moving upward and others flowing across the side.
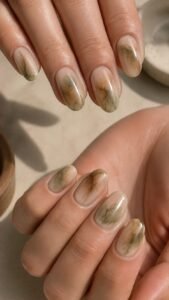
A glossy surface will deepen the earthy palette and make the diffused areas look suspended inside the polish.
Pierced Noir Nails With Miniature Hardware
Pierced noir nails combine deep polish with tiny metallic elements positioned along the edges, tips, or cuticle area. The hardware should remain small and carefully arranged so the design appears fashionable rather than excessively heavy.
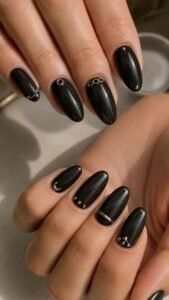
Soft black, charcoal, and dark espresso bases can create slightly different moods. Medium almond, rounded square, and narrow ballerina shapes provide enough structure for the details while allowing the metallic pieces to remain visible and balanced.
Silver Loop Edge Nails
Paint the nails in a smooth charcoal black and attach one miniature silver loop near the outer corner of selected tips. The loop should appear to pass through the edge without hanging far beyond the nail. Add a thin silver dot on the opposite side to balance the placement.
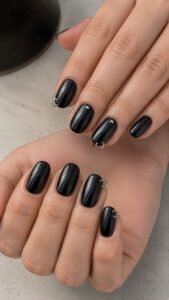
Keep the remaining nails plain and glossy so the small hardware detail becomes the central feature rather than disappearing inside excessive decoration.
Black Pearl Pin Clusters
Use an opaque espresso base and arrange three tiny black pearls near the side of two accent nails. Place a silver pin detail between the pearls, allowing the arrangement to follow the natural curve of the nail.
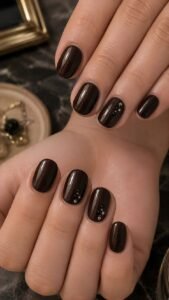
The dark pearls create texture without introducing a contrasting color, while the silver element provides a precise flash of light. Short rounded nails make this detail feel compact, unusual, and surprisingly wearable.
Bronze Chain Cuticle Curves
Choose a deep plum base and place a very fine bronze chain along the lower curve of one or two nails. Keep the chain close to the cuticle without touching the skin. Add a single bronze stud to the remaining nails so the set stays connected.
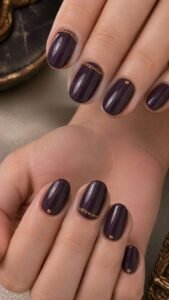
The warm metal softens the darkness of the plum and creates a richer alternative to bright silver hardware or heavily jeweled nail designs.
Laser Film Nails With Shifting Prism Light
Laser film nails use thin holographic pieces beneath clear or tinted polish to produce changing color as the hands move. Unlike a uniform mirror finish, the reflective areas appear in selected sections, leaving parts of the base visible.
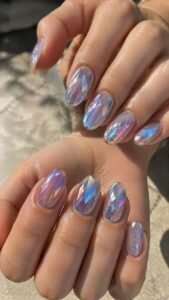
Precise shapes create a futuristic appearance, while torn fragments feel more artistic and unpredictable. Cool transparent colors strengthen the light effect, although soft pink, copper, and smoke tones can create a warmer interpretation.
Violet Prism Windows
Apply a transparent violet base and place a narrow rectangular piece of holographic film through the center of each accent nail. Seal the film beneath clear gel so the surface remains smooth. Leave a visible border of violet around every reflective window.
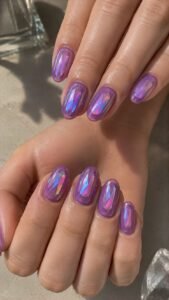
As the angle changes, the center can shift between blue, pink, and green while the tinted frame keeps the complete manicure visually consistent.
Aqua Signal Strips
Begin with a clear base and add slim aqua film strips in different directions across the nails. One strip can travel vertically, another can sit near the tip, and a third can cross a corner. Add a fine navy line beside selected pieces to strengthen their shape.
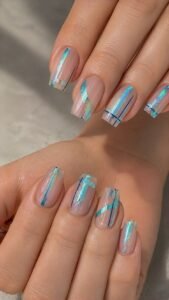
The design resembles light signals moving across glass, making it especially effective on medium square nails with crisp, carefully filed edges.
Rose Copper Pixel Flakes
Use a pale rose base and cut copper holographic film into tiny square and rectangular fragments. Arrange the pieces in loose clusters that become lighter toward the tip. Avoid placing them in perfectly even rows because slight variation will make the design appear more natural.
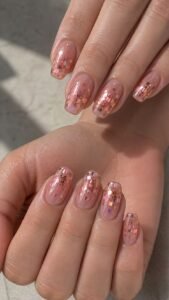
A transparent pink surface layer can soften the metallic reflection and blend the pieces into the base while preserving their shifting color.
Caviar Texture Nails With Refined Beadwork
Caviar texture nails use miniature beads to create tactile surfaces, borders, and concentrated areas of detail. Instead of covering every nail completely, place the beads where they strengthen the shape or introduce a controlled focal point.
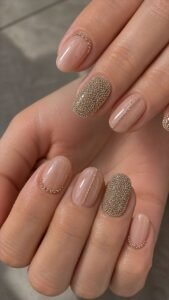
Combining different bead sizes can add dimension, but the palette should remain limited. Neutral metallics create a polished result, while deep red, graphite, or jewel tones produce a stronger and more dramatic finish.
Champagne Bead Fade
Paint the nails in a translucent peach beige and place tiny champagne beads near the cuticle. Reduce the number of beads gradually as they move toward the center, leaving the upper half of the nail clear.
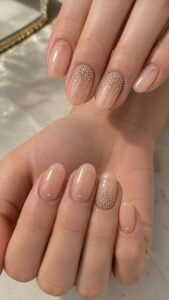
Apply the fade to two accent nails and use one individual bead near the base of the remaining fingers. The soft metallic texture catches light without making the complete manicure appear overly decorated.
Ruby Seed Borders
Use a muted pink base and line one side of each accent nail with miniature ruby red beads. Keep the border narrow and allow it to end before reaching the tip. Add a thin burgundy painted line beneath the beads to make the arrangement look finished.
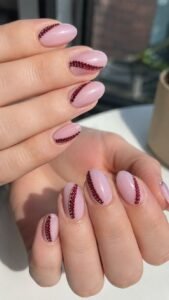
Medium oval nails support the curved border, while the rich red texture introduces color in a more unusual way than ordinary painted details.
Graphite Bead Panels
Apply a cool beige base and create a compact graphite bead panel near the free edge of selected nails. Use a mixture of matte and glossy beads so the dark section changes subtly under different lighting.
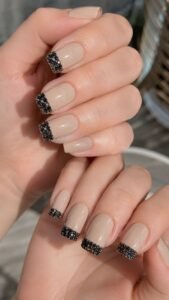
Keep the panel straight on square nails or slightly curved on almond shapes. The result provides texture and depth while maintaining enough clear base to prevent the dark beads from overwhelming the hands.
Modern Animal Pattern Nails With Controlled Scale
Animal pattern nails feel more refined when the markings are reduced, stretched, or partially hidden rather than repeated in a standard all over print. Begin with a limited palette and vary the scale between nails. Sheer backgrounds can make the markings feel lighter, while saturated bases produce stronger contrast.
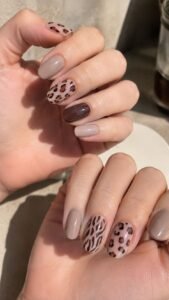
Use only one animal influence within each manicure so the complete set remains cohesive, deliberate, and easier to coordinate with clothing.
Tortoiseshell Mesh Nails
Build translucent amber and honey brown patches over a clear warm base, then place thin dark lines between selected areas. The lines should create an open mesh rather than enclosing every patch. Keep the pattern concentrated near one side and allow the opposite side to remain transparent.
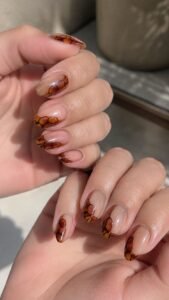
This approach preserves the depth associated with tortoiseshell while introducing a cleaner structure that looks elegant on medium oval or almond nails.
Zebra Contour Ribbon Nails
Choose a pale stone base and paint narrow black ribbons that follow the natural length of the nail. Allow some ribbons to curve together before separating near the tip. Avoid filling the entire surface with equal stripes.
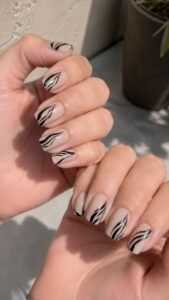
The increased open space gives the familiar black and white contrast a more modern appearance. Short square nails make the flowing lines appear graphic, while longer nails emphasize their movement.
Snow Leopard Mist Nails
Apply a translucent gray beige base and create soft white patches with blurred edges. Place tiny charcoal markings inside only a few of the pale areas. Keep the spots concentrated through the middle of selected nails and leave the cuticle and tip mostly clear.
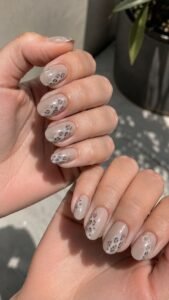
The misty background softens the animal influence, producing a quiet design that works well with silver accessories, monochrome outfits, and cool neutral clothing.
Matte Shadow Nails With Glossy Impressions
Matte shadow nails rely on surface contrast rather than multiple colors or decorative objects. A velvety base absorbs light, while clear glossy details appear only when the hands move. This creates a manicure that looks simple from a distance and more intricate at close range.
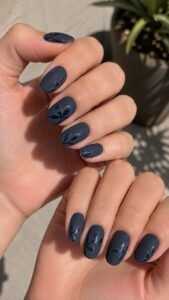
Deep colors provide the strongest contrast, although muted blue, taupe, and dusty rose can make the effect gentler. Precise preparation is important because both finishes reveal the nail shape clearly.
Espresso Window Gloss
Cover the nails with matte espresso brown and paint a transparent glossy rectangle through the center of selected fingers. Keep the window narrow and leave a wide matte border around it.
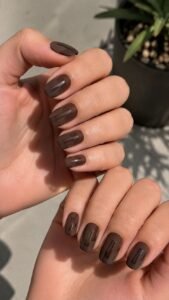
Change the rectangle length slightly across the set to introduce variation. The rich brown remains the only visible color, while the reflective windows create a clean architectural detail that becomes noticeable under direct light.
Plum Fingerprint Shine
Apply a dark matte plum base and use clear gel to create delicate curved lines resembling enlarged fingerprint patterns. Place the design on two or three nails and keep the lines thin enough to preserve the dark background.
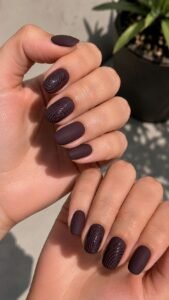
Each pattern should follow a different curve rather than repeating exactly. The glossy lines will appear and disappear as the nails turn, giving the monochrome manicure unexpected movement.
Stone Blue Rain Paths
Choose a muted stone blue base with a matte finish. Paint several narrow glossy paths moving diagonally across the nails, allowing them to join and separate like rain traveling over a window. Add one small clear droplet at the end of selected paths.
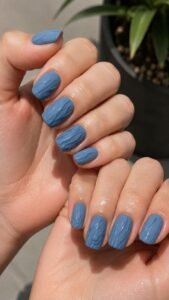
Keep the surface detail low and smooth so the concept remains practical. Rounded square nails make the directional lines feel balanced and calm.
Curated Trinket Nails With Personal Miniatures
Curated trinket nails offer a more organized approach to charm filled manicures. Instead of attaching unrelated decorations everywhere, choose one miniature theme and repeat its materials, shapes, or colors across the set. Place larger objects on one or two nails, then use painted details or smaller accents elsewhere.
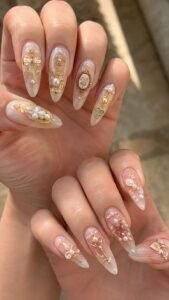
A neutral background helps every trinket remain readable, while medium and long extensions provide enough space for comfortable, secure placement.
Mini Dice and Number Charms
Use a translucent smoky base and attach one tiny dice charm to an accent nail. Paint miniature numbers in black, red, and ivory across the remaining nails, changing their position each time.
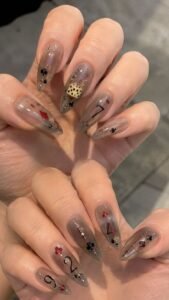
Add a few metallic dots to connect the artwork with the charm. The result feels playful without becoming childish, especially when the numbers remain small and the palette stays limited to deep, classic colors.
Ribbon Bow and Safety Pin Mix
Apply a soft gray pink base and place one miniature silver safety pin across a central accent nail. Add a small sculpted ribbon bow to another finger, then paint narrow ribbon loops across the rest of the set.
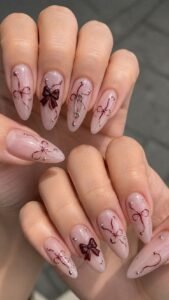
Keep the bow in a muted burgundy or black shade for contrast. Repeating the curved ribbon lines helps the two different trinkets feel connected rather than randomly selected.
Tiny Heart Locket Accents
Choose a sheer cocoa pink base and place one small heart locket charm near the center of a single nail. Use miniature gold keyholes, fine chains, and painted heart outlines on the surrounding fingers.
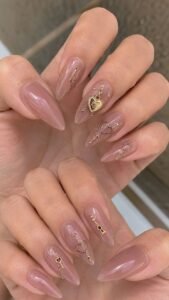
Leave at least two nails nearly plain to prevent the jewelry theme from becoming crowded. The warm metallic details create a romantic effect that feels more distinctive than traditional heart decals or scattered rhinestones.
Turn Fresh Nail Inspiration Into Your Signature Look
A memorable manicure begins with a concept that suits your style instead of combining every detail into one crowded set. Choose diffused blooms for fluid color, miniature hardware for an edgier mood, laser film for shifting light, or beadwork for controlled texture. Animal markings can provide graphic character, matte and gloss finishes can add quiet depth, and curated trinkets can make the design feel personal. Save the ideas that match your preferred length, shape, and wardrobe, then continue exploring related nail color, manicure, beauty, and styling articles to develop a complete collection of inspiration for every mood and occasion.
