
A graduation manicure can celebrate achievement without repeating mortarboards, diplomas, honor cords, class rings, or school crests. The best nails for graduation feel connected to the ceremony while looking polished beside formal clothing, jewelry, and shoes. The six ideas below explore photo booth strips, admission wristbands, campus brick paths, celebration cakes, confetti poppers, and commencement podiums.
Each theme includes three variations for short square, rounded, squoval, almond, or coffin nails. Choose colors from the outfit or school palette, but keep the artwork selective so the finished set remains clear in photographs.
Photo Booth Strip Nails With Candid Celebration Frames
Photo booth strip nails capture graduation pictures through stacked frames, cropped flashes, and narrow cut marks. Black, cream, soft gray, coral, and one school color create a clean formal palette. The design should suggest printed photographs without painting detailed faces.
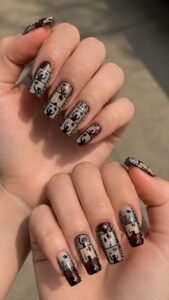
Short nails can carry one cropped frame, while longer shapes can hold two or three vertical panels. Open space between the frames keeps the manicure stylish rather than crowded.
Stack Cream Portrait Frames Over Black
Paint the nail soft black and place two cream rectangles one above the other, leaving a narrow dark gap between them. Add a simple gray shoulder silhouette inside each frame without facial features.
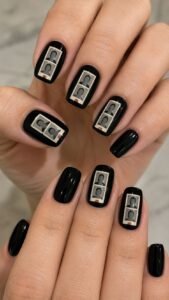
Shift the upper figure slightly to one side so the two images appear candid rather than duplicated. A small coral mark beneath the lower panel can act as the printed edge.
Add a Bright Flash Corner
Use a muted school color as the base and paint one cream photo frame entering from the outer side. Fill the upper corner with a broad white flash shape and soften its edge with pale gray.
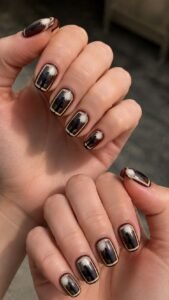
Keep the remaining image area dark and simple. The cropped flash makes the frame feel lively while giving short rounded nails a clear focal point.
Mark a Coral Cut Line Between Panels
Apply a warm cream foundation and arrange three narrow charcoal panels through the center. Separate the second and third panels with a coral cut line made from short, evenly spaced blocks.
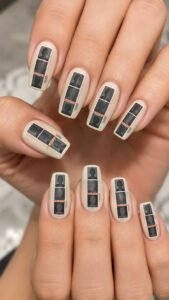
Add one tiny gray tab near the side as though the strip is ready to tear. This graphic detail works well on square and coffin shapes.
Ceremony Wristband Nails With Access Pass Details
Ceremony wristband nails use wrapped bands, tear tabs, stamped blocks, and fastening points for a modern event inspired manicure. Cobalt, raspberry, ivory, charcoal, and muted silver keep small details visible.

The band can cross the nail, curve near the cuticle, or appear partly wrapped around one side. Avoid readable words and numbers so the idea stays decorative and easy to personalize.
Wrap a Cobalt Band Around Sheer Nude
Begin with a sheer nude base and paint one wide cobalt band across the lower third. Curve both ends slightly downward so the strip appears to continue around the finger.
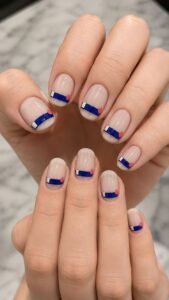
Add one small ivory block near the side and a raspberry fastening point at the opposite edge. The open tip keeps the color strong without making the compact nail look heavy.
Add a Perforated Tear Tab
Paint the nail ivory and create a raspberry wristband entering diagonally from the cuticle side. Place a narrow charcoal tab at the upper end, then divide it with four tiny ivory openings that suggest perforation.
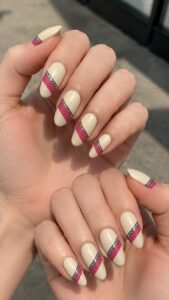
Stop the band before it reaches the opposite corner. The angled placement creates movement and suits almond nails without resembling a regular diagonal stripe.
Build a Two Tone Security Patch
Use a cobalt base and place one compact silver gray rectangle near the cuticle. Divide the patch into two uneven fields, one cream and one raspberry, then add a tiny charcoal square where they meet.
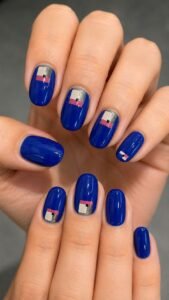
Keep the surface flat and smooth. A smaller version near the tip of another nail can connect the set without repeating the complete wristband.
Campus Brick Path Nails With Grounded Academic Character
Campus brick path nails take inspiration from walkways crossed before and after the ceremony. Rust, clay, cream, moss, and navy create a warm palette without obvious academic symbols.
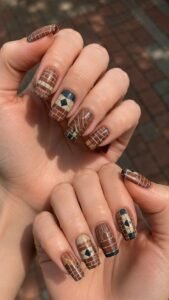
Keep the brickwork broad enough to read on short nails. Changing its direction, scale, and inserted markers across the hands creates variety while preserving the pathway story.
Lay Clay Bricks in a Herringbone Turn
Cover the nail in warm cream and arrange six clay rectangles in a loose herringbone section near one side. Leave narrow cream mortar gaps between the pieces and allow two bricks to disappear beyond the edge.
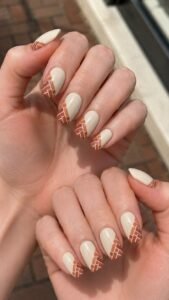
Keep the opposite half mostly open. The angled pattern gives squoval and short square nails more movement without requiring shimmer or raised decoration.
Insert One Pale Commemorative Paver
Paint a rust base and add one large pale stone rectangle near the center, surrounded by three smaller clay pieces. Place a simple navy line and one small dot inside the pale paver instead of readable writing.
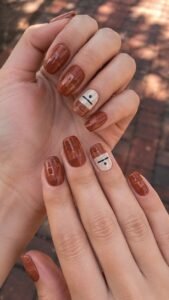
The single light block becomes the focus, suggesting a commemorative stone while remaining clean enough for formal graduation styling.
Curve a Moss Border Along the Walkway
Use a soft beige foundation and build a narrow brick path from the cuticle toward one side of the tip. Add a muted moss border that follows the outer edge in one smooth curve.
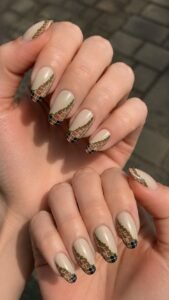
Keep the bricks slightly irregular so the path feels natural. A navy corner marker can provide contrast and connect the design with darker outfits.
Celebration Cake Nails With Tailored Formal Layers
Celebration cake nails use smooth tiers, clean icing ledges, plaque shapes, and sliced layers rather than cherries, flowers, sprinkles, or sugary charms. Ivory, blackcurrant, butter cream, coral, and deep blue create a formal palette. Square and coffin nails support stacked tiers, while oval nails soften the edges.
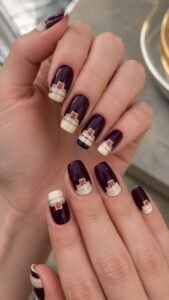
Flat, carefully outlined surfaces keep the theme polished for the ceremony and photographs.
Stack Two Ivory Tiers Over Blackcurrant
Apply a blackcurrant base and paint two ivory cake tiers rising from the tip. Make the lower tier wider and add one narrow butter cream ledge between both sections.
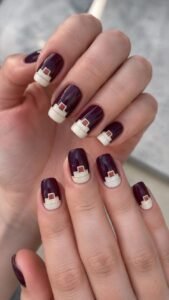
A small coral block can sit at the center of the upper tier without becoming a topper. Cropping the cake at the tip makes the design bold on shorter nails.
Center a Deep Blue Fondant Plaque
Paint the nail butter cream and place one deep blue oval plaque near the center. Frame it with a thin ivory gap and a coral outer border, leaving the inside blank.
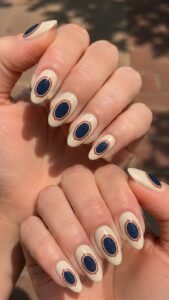
Add one short shadow beneath the plaque so it appears attached to a smooth cake surface. This version gives the celebration theme a formal, uncluttered focal point.
Reveal a Layered Slice at the Side
Use an ivory foundation and paint one cake slice entering from the outer edge. Divide it into three layers using coral, pale blue, and blackcurrant, separated by thin cream fillings.
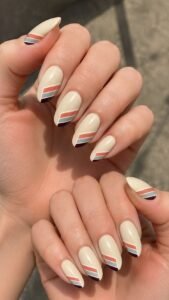
Keep the top smooth and angle the front edge toward the tip. The cropped slice provides color while avoiding common dessert decorations.
Confetti Popper Nails With Controlled Celebration Energy
Confetti popper nails bring movement through paper cones, released shapes, torn seals, and directional paths. Keep the idea organized rather than scattering random dots across every finger.
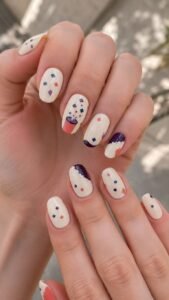
Coral, violet, cobalt, cream, and charcoal create a bright palette without depending on glitter. One complete popper can establish the story while nearby nails show selected pieces in motion.
Open a Coral Cone From the Cuticle
Paint the nail cream and place one coral cone beginning at the cuticle, widening slightly toward the center. Add a violet inner opening and a narrow charcoal rim.
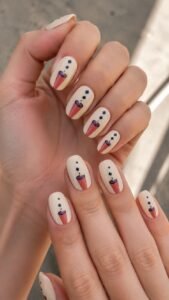
Release three cobalt squares from the top, spacing them farther apart as they approach the tip. The growing distance creates a clear burst without covering the entire nail.
Send Paper Shapes Along One Curve
Use a cobalt base and arrange five flat confetti pieces along one sweeping path. Combine a coral rectangle, cream crescent, violet triangle, and two charcoal blocks, changing their angles as the curve rises.
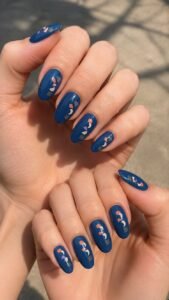
Leave the rest of the nail solid. The organized movement feels more sophisticated than an all over confetti pattern.
Show a Torn Seal Near the Tip
Apply a sheer beige base and paint one small violet popper seal near the outer tip. Split it into two uneven pieces with a narrow cream gap, then add one coral tab curling toward the side.
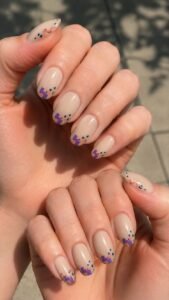
Three cobalt fragments can continue beyond the seal. This close view gives short nails a strong detail without repeating the whole cone.
Commencement Podium Nails With Formal Stage Structure
Commencement podium nails translate walnut panels, speech card ledges, front emblems, and reading surfaces into refined geometric art. Walnut brown, ivory, navy, forest green, and brushed brass create an academic palette without microphones or auditorium seating.
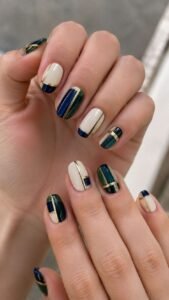
The podium can appear as a cropped front, side profile, or small hardware detail. Straight edges suit square and coffin nails, while curved shadows soften oval shapes.
Frame a Walnut Podium Face in Ivory
Paint the nail deep navy and add one walnut rectangle through the lower half. Frame it with a narrow ivory border, then place a smaller forest green panel inside.
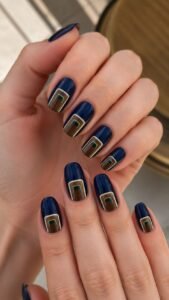
Keep the center blank and allow the lower edge to disappear beyond the tip. The layered front creates formal stage character without lettering, seals, or school logos.
Add a Slanted Speech Card Ledge
Use an ivory base and paint one navy ledge entering diagonally from the side. Place a pale gray card above it, tilted at the same angle, then add one short walnut support underneath.
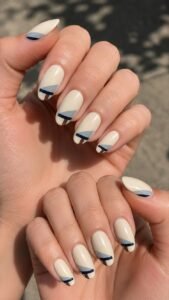
Leave the opposite half open so the arrangement reads as a close view of the podium surface rather than a random stack of blocks.
Crop a Brass Reading Rail at the Cuticle
Apply forest green polish and draw one brushed brass rail curving gently across the cuticle area. Add two short walnut supports beneath it and a narrow ivory highlight along the upper edge.
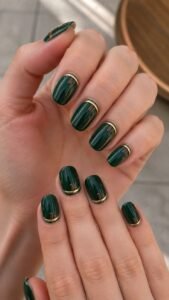
Stop the rail before both sides. This restrained hardware detail connects the manicure to the ceremony while remaining elegant beside rings and bracelets.
Let Graduation Nails Celebrate the Experience in a New Way
Meaningful nails for graduation do not need to repeat familiar ceremony symbols. Photo booth strips capture proud pictures, while wristband details recall entry into the event. Campus brick paths represent the walk toward a milestone, and tailored cake layers bring celebration without common decorations. Confetti poppers add controlled energy, while podium panels reflect the formal moment of recognition. Choose the theme that suits your outfit and nail length, then adjust the colors while preserving its identity. Related articles about graduation outfits, hairstyles, makeup, jewelry, short nail designs, acrylic shapes, manicure care, and celebration styling can complete the look.
