
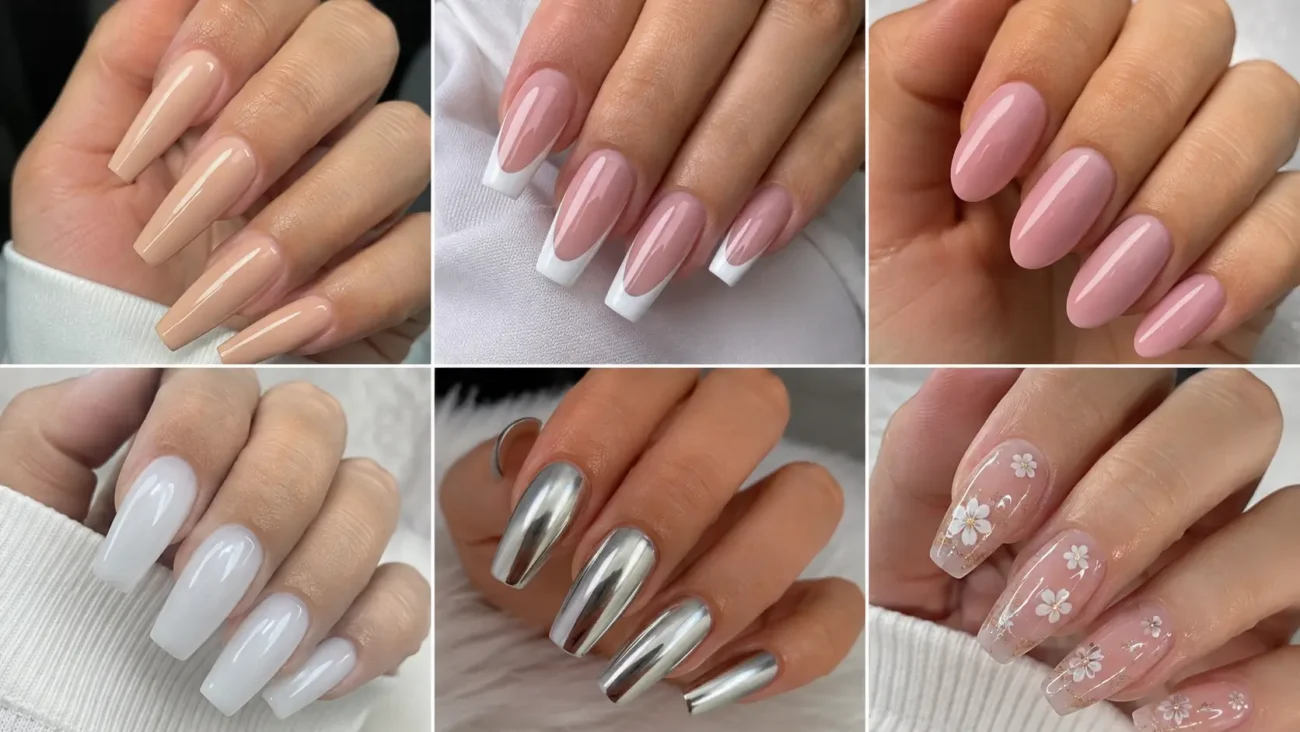
Nails acrylic designs offer more than extra length because the material can hold carved edges, raised components, strong color divisions, and shaped surfaces. A successful set should use that structure without turning every finger into the same decoration.
The six ideas below explore zipper tracks, climbing holds, accordion bellows, carved soap forms, puzzle boxes, and artist mannequins. Each concept includes three interpretations for different acrylic shapes. Choose one story, adjust its colors, and let the details change across both hands.
Zipper Track Acrylic Nails With Opening Panel Illusions
Zipper track nails use raised teeth, curved pull tabs, and separated panels to make the surface appear ready to open. Acrylic supports the sculpted pieces while keeping them smooth enough for practical wear.
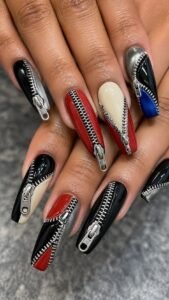
Black, silver gray, cherry red, cream, and cobalt create strong contrast. Longer nails can carry a full track, while compact shapes need one cropped opening.
Part a Cherry Panel Through the Center
Cover the nail in cherry red and build two rows of silver gray teeth through the center, leaving a narrow black opening between them. Widen the opening near the tip so the panel looks partly unfastened.
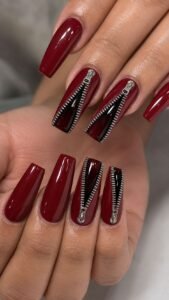
Add one small pull tab close to the cuticle while keeping the surrounding red smooth. The changing gap creates movement without gems or glitter.
Curve a Cobalt Zipper Around One Side
Use a warm cream base and guide a cobalt zipper from the lower side toward the upper corner. Keep the teeth broad enough to remain visible and let the track follow one gentle curve.
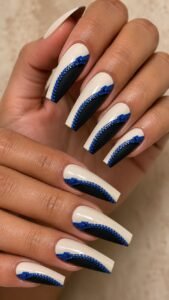
Place a matte black panel inside the boundary. This side placement gives almond and coffin shapes a longer appearance while leaving generous open space.
Fold Back a Black Opening at the Tip
Apply a soft gray base and create one black triangular opening across the tip. Frame both edges with cream zipper teeth, then sculpt a low silver pull near one corner.
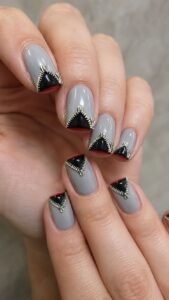
Add a narrow cherry underside beneath the black section so the opening appears folded back. Cropping the feature makes it bold on short acrylic nails without covering the cuticle area.
Climbing Hold Acrylic Nails With Colorful Sculpted Grip
Climbing hold nails turn the acrylic surface into a miniature wall of rounded grips, angled ledges, and recessed bolt points. The forms should remain low and smoothly sealed so they create dimension without becoming difficult to wear.
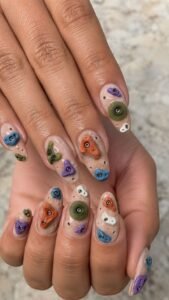
Terracotta, moss green, violet, chalk white, and slate blue create an energetic palette. A few well spaced shapes let the base act like the wall behind them.
Anchor Three Holds Across a Slate Wall
Paint the nail slate blue and sculpt three low holds in terracotta, violet, and moss green. Give each one a different outline, such as a rounded block, narrow ledge, and uneven oval.
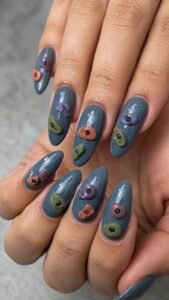
Add one tiny dark bolt point to every form. Arrange them diagonally so the eye travels upward and the design supports the natural length of the nail.
Build a Chalk Ledge Near the Cuticle
Use a matte moss base and add one broad chalk white ledge close to the cuticle. Shape its upper edge with two shallow dips, then place a slim terracotta shadow underneath. Keep the tip completely open.
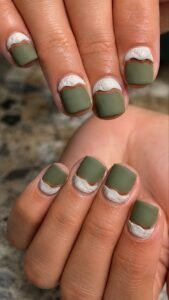
This lower placement creates a strong sculpted detail while preserving a clean area that balances shorter square and squoval acrylic shapes.
Scatter Violet Foot Holds Along the Edge
Cover the nail in warm stone beige and place four tiny violet grips along one outer edge. Change their size and angle so they resemble a route rather than a border.
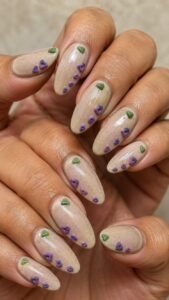
Add one moss green hold near the opposite tip to suggest the next movement. The uneven spacing keeps the concept natural.
Accordion Bellows Acrylic Nails With Compressed Color Rhythm
Accordion bellows nails use repeated folds, expanding chambers, and sturdy end plates to create a sculptural pattern that changes across the hand. Every section has a shallow ridge and recessed valley that acrylic can hold clearly.
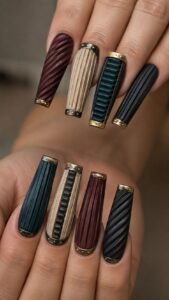
Burgundy, parchment, deep teal, brass, and charcoal create a crafted palette. The folds can travel vertically, diagonally, or across a central panel.
Compress Burgundy Folds Between Brass Ends
Apply a parchment base and build a short burgundy bellows section through the middle. Shape five narrow folds, pressing the center ridges closer together and leaving wider spacing near the ends.
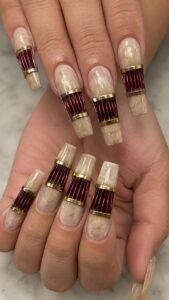
Add one flat brass plate on both sides. The compact panel resembles a working object while the open cuticle and tip keep it light.
Expand Teal Chambers Toward the Tip
Paint the nail charcoal and create four deep teal folds that widen as they move toward the flat tip. Add a parchment highlight along the upper edge of each ridge so the structure remains visible.
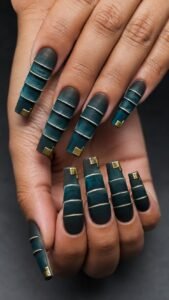
Finish the widest section with a small brass corner. The growing spacing makes coffin nails look more architectural and intentional.
Bend a Parchment Bellows Across the Corner
Use burgundy as the foundation and place one parchment bellows entering from the lower corner. Curve the connected folds toward the side, then stop them before the center.
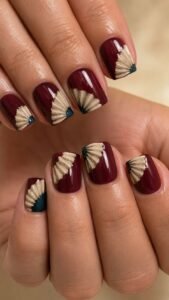
Add a dark teal end cap where the form leaves the frame. This cropped viewpoint gives short nails the impression of a larger sculpted object without repeating the full arrangement.
Carved Soap Acrylic Nails With Smooth Beveled Surfaces
Carved soap nails focus on softened rectangles, scooped centers, stamped shapes, and creamy surfaces that look freshly cut. Acrylic can build low bars with rounded bevels while keeping every element smooth.
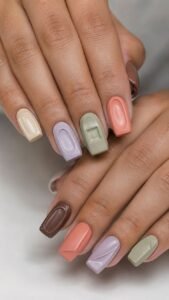
Buttermilk, lilac, sage, coral, and cocoa create a clean palette. Each nail can show an untouched block, sliced corner, or shallow impression.
Bevel a Buttermilk Bar Over Sage
Paint the nail muted sage and sculpt one low buttermilk rectangle near the center. Round all four corners and slope the edges toward the base so the bar appears polished by use.
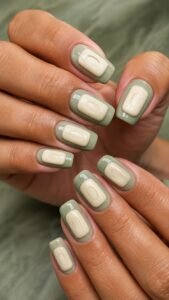
Press one shallow oval into the upper surface without lettering. A soft cocoa shadow along the lower side separates the pale shape from the background.
Slice a Coral Corner From Lilac
Use a creamy lilac base and place one coral soap form across the upper half. Remove the visual corner with a diagonal cream section, then add two coral lines inside the exposed area to suggest a clean slice.
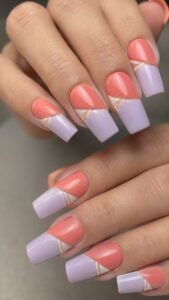
Keep the lower half simple and glossy. The cut corner introduces movement while preserving the carved character.
Scoop Three Channels Through Cocoa
Apply a warm beige foundation and build one cocoa bar lengthwise along the side. Carve three broad channels into its surface, changing their depth slightly so they look handmade. Add a tiny sage fragment near the lowest groove. The narrow placement lengthens short acrylic nails and leaves the opposite side open.
Puzzle Box Acrylic Nails With Sliding Secret Panels
Puzzle box nails borrow from hidden drawers, interlocking corners, and movable wooden sections rather than ordinary jigsaw pieces. Flat color planes combine with low raised borders to make each nail look like a small mechanism.
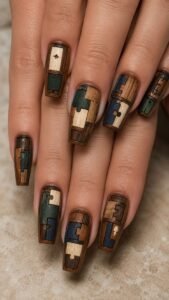
Walnut brown, ochre, forest green, ink blue, and ivory create a handcrafted palette. Square, coffin, and almond shapes all suit the structured compartments.
Slide an Ochre Drawer From Walnut
Cover the nail in walnut brown and place one ochre drawer slightly above the surface, shifted toward the tip. Add a narrow dark gap behind its lower edge and one small ivory grip near the center.
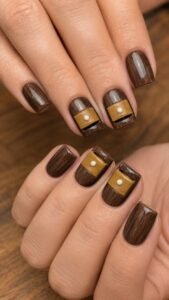
Keep the remaining base plain so the moving section feels believable. On compact nails, reduce the drawer length while preserving the visible shadow.
Interlock Forest Corners Around Ivory
Use an ivory base and build four forest green corner pieces that point toward an open center. Give every corner a different length so they appear capable of sliding together without forming a perfect frame.
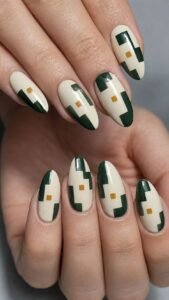
Add a small ochre square in the remaining space. The uneven structure feels more mysterious than regular geometric blocking.
Hide an Ink Blue Compartment at the Side
Paint the nail warm ochre and create one narrow ink blue panel along the outer side. Surround it with a raised walnut border, then add a tiny ivory notch near the cuticle as an opening point.
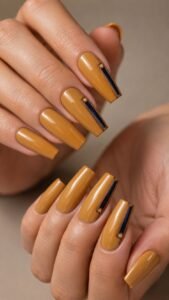
Stop the compartment before the tip. This quieter version connects with detailed puzzle box nails while remaining polished enough for everyday outfits.
Artist Mannequin Acrylic Nails With Jointed Sculptural Forms
Artist mannequin nails use wooden segments, rounded joints, pose markers, and support blocks to create an unexpected studio theme. The forms should remain abstract and cropped, avoiding complete figures.
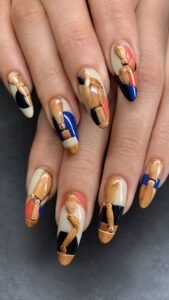
Honey wood, black, cobalt, coral, and cream provide clear definition. Longer nails can hold connected sections, while short shapes can focus on one joint.
Connect Two Honey Segments With Cobalt
Apply a cream base and sculpt two honey colored segments meeting near the center. Join them with one cobalt circular joint, then angle the upper piece toward the side as though it has been repositioned.
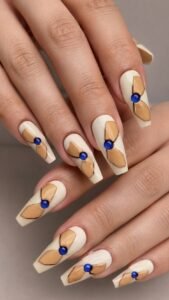
Add a narrow brown shadow beneath each segment. The simple connection creates movement without faces, hands, clothing, or detailed figure painting.
Rotate a Coral Joint Near the Tip
Paint the nail matte black and place one broad coral joint close to the tip. Attach two short cream pieces at different angles, allowing one to leave through the side and the other to stop near the center.
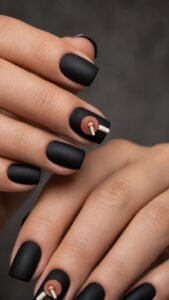
Add one tiny honey point inside the coral circle. The high contrast composition suits shorter acrylic nails.
Balance a Wooden Form on a Support Block
Use cobalt polish and build one small honey support block near the cuticle. Extend a narrow wooden segment upward, then connect it to a larger cream oval with a dark circular joint.
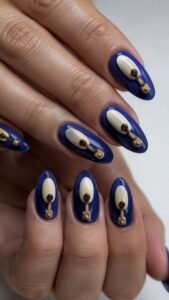
Keep the form slightly away from the center so the blue background remains visible. The arrangement suggests a studio mannequin posed on its stand without illustrating the whole object.
Let Nails Acrylic Designs Use Their Structure Creatively
Nails acrylic sets feel most original when the strength of the material becomes part of the idea. Zipper tracks create opening illusions, while climbing holds turn raised color into a wearable route. Accordion bellows add compressed rhythm, and carved soap forms bring smooth bevels. Puzzle boxes introduce secret panels, while artist mannequins create jointed movement. Choose the concept that suits your length and routine, then adjust the colors while preserving its construction. You can also explore related articles about acrylic nail shapes, short manicures, coffin nails, nail colors, salon care, outfit styling, jewelry combinations, and beauty inspiration.
