
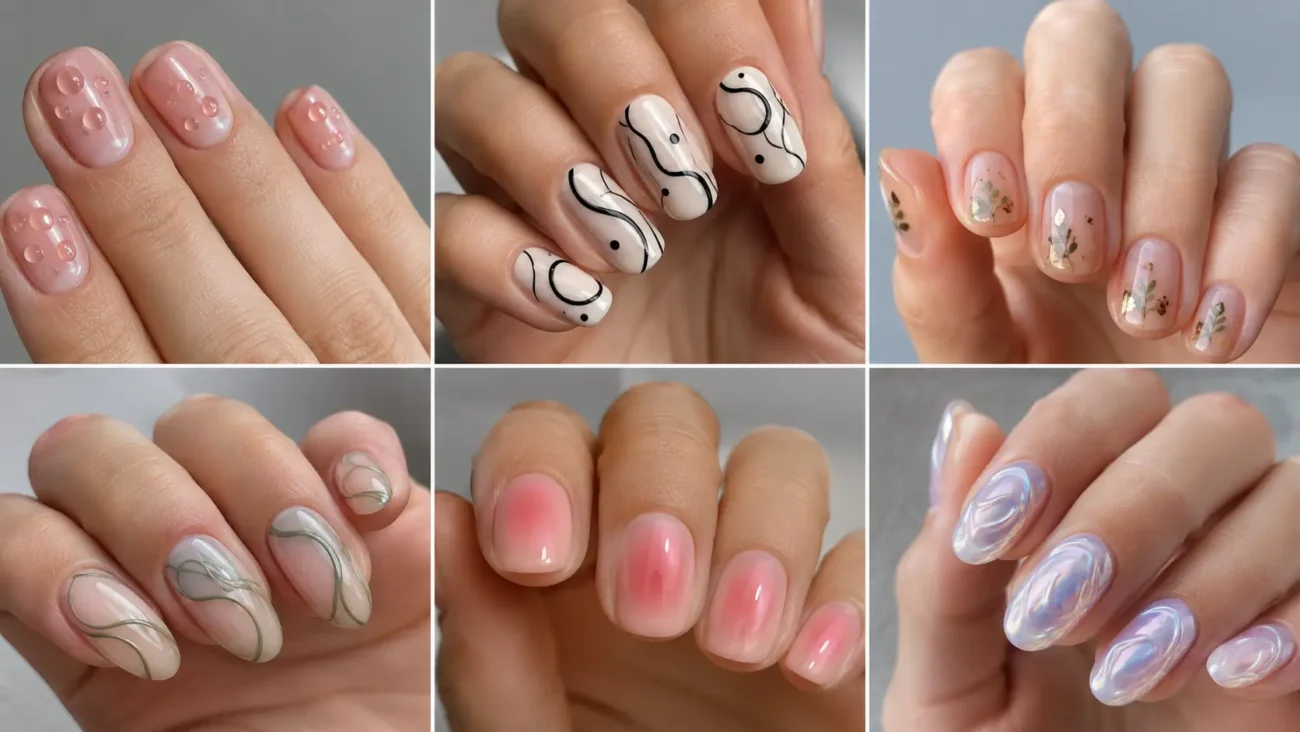
Nail polish designs can look original without depending on thick sculpting, oversized charms, or a different color on every finger. The most memorable manicures often begin with one precise visual reference, then translate it through sheer layers, fine lines, compact shapes, and carefully placed shine. Short rounded and square nails can carry cropped details, while oval and almond shapes provide more room for longer patterns and transparent depth.
The six ideas below explore spectral displays, security envelopes, keyhole plates, particle trails, vacuum tubes, and gyroscope rings. Each design can be simplified for home painting or expanded by a nail artist, while repeated color and consistent spacing keep both hands connected.
Spectral Emission Line Nails With Luminous Color Bars
Spectral emission line nails transform narrow bands of light into a clean manicure that feels colorful without becoming crowded. A black, navy, or smoky violet base makes thin bars appear illuminated, while a sheer gray base creates a quieter interpretation.
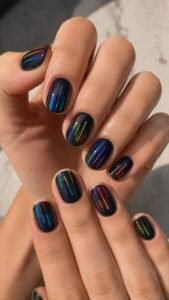
The design is especially effective on short nails because each finger needs only a few carefully spaced marks. Choose three or four vivid shades and repeat them in changing combinations so every nail feels related but never identical.
Separate Bright Lines With Deep Space
Paint several narrow vertical bars near one side of the nail, leaving generous dark space between them. Use electric blue, coral red, violet, and pale green, then vary the order across the hand. Keep every line crisp and avoid filling the entire surface.
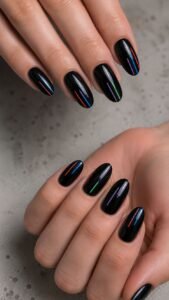
The empty background gives each color room to glow and makes the smallest marks visible from a distance. A clear glossy coat deepens the dark base and helps the bright bars appear suspended beneath glass.
Create One Luminous Double Line
Choose one accent nail and place two extremely close lines in the same color, leaving only a hairline gap between them. Make the pair brighter or slightly longer than the surrounding marks so it becomes the focal point. Repeat the same shade as a single bar on two nearby nails.
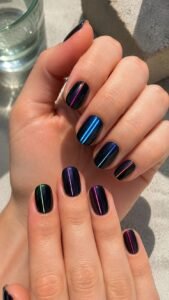
This controlled echo connects the manicure while preserving the unusual double detail. A pale highlight placed along one side can make the pair look more intense without adding glitter.
Fade a Color Bar Into the Base
Begin one line with opaque color near the free edge, then reduce the pressure and pigment as it travels toward the center. The final section should disappear softly into the base instead of ending in a blunt stop.
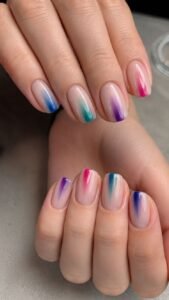
Use this faded treatment on only a few fingers and keep the remaining bars solid. The changing opacity introduces movement and supports the appeal of translucent polish without turning the entire manicure into a familiar gradient.
Security Envelope Nails With Hidden Blue Lattice
Security envelope nails borrow their pattern from the intricate lining hidden inside confidential paper. Fine blue or gray marks create a soft geometric field, while torn openings and narrow seal details reveal a second layer.
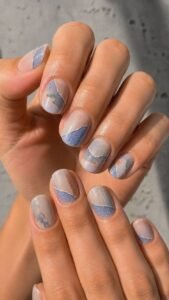
The concept works with ordinary polish because slight variations make the pattern feel printed rather than mechanically perfect. Use cloudy white, pale blue, graphite, and one warm accent color over a sheer base for a manicure that remains light and wearable.
Build a Compact Interior Lattice
Paint a small field of crossing curves, diamonds, or repeated hooks on one section of the nail. Keep the pattern narrow and allow it to disappear beyond the side wall so it feels cropped from a larger envelope lining.
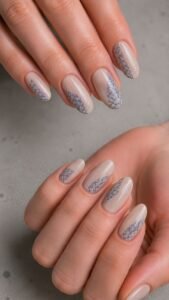
Repeat the same line color across every finger, but change the visible portion of the lattice. Short nails can show one corner, while longer nails can carry a broader panel without covering the entire natural base.
Tear Open One Clear Paper Window
Leave an irregular clear opening through the patterned field and outline only part of its edge with cloudy white polish. The shape should look softly torn rather than perfectly cut, with one narrow point and one rounded section. Add a faint shadow beneath the white edge to suggest layered paper.
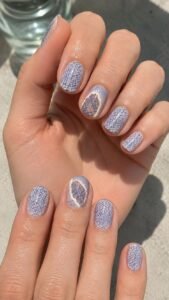
Use the complete opening on one or two accent nails, then repeat a tiny clear break elsewhere so the set feels connected without copying the same window.
Add a Discreet Seal Strip
Paint one slim strip close to the free edge or side wall in muted red, warm gray, or deep blue. Keep the strip separate from the lattice and add two tiny breaks so it does not resemble an ordinary border.
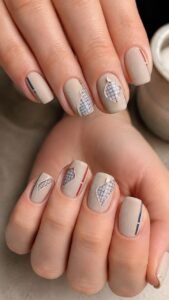
On one nail, let the seal overlap the torn opening by a small amount. A glossy finish on the strip beside a satin paper field creates a subtle material contrast that makes the design more convincing.
Keyhole Escutcheon Nails With Polished Framing
Keyhole escutcheon nails turn decorative key plates into elegant central details. The design combines a small dark opening with a shaped frame, tiny screw marks, and selective metallic highlights.
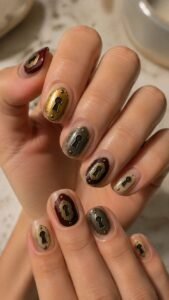
Brass, pewter, black, oxblood, and muted ivory create a rich palette that works across seasons. Oval and almond nails support elongated plates, while short square nails can show a compact circular version near the cuticle or free edge.
Shape an Elongated Key Plate
Paint a narrow oval, shield, or softened diamond in the center of the nail, leaving enough open base around it. Use antique gold, warm silver, or deep red brown, then outline only one side with a darker shade.
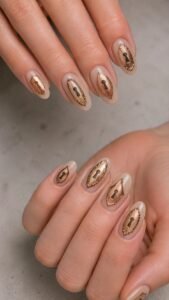
The slightly uneven border makes the plate feel aged rather than newly manufactured. Change the plate shape across the hand while repeating the same finish and general scale for a collected appearance.
Cut a Small Dark Key Opening
Add a tiny keyhole shape within the plate using black, deep plum, or charcoal. Keep the round upper section compact and extend a short narrow stem beneath it. The opening should remain smaller than the surrounding frame so the metal shape still controls the design.
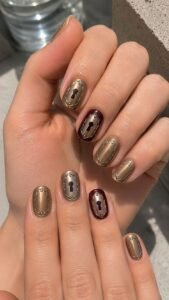
Place it slightly above or below center on selected nails to create variation. A pinpoint highlight near the upper curve can suggest polished depth without physical texture.
Mark the Frame With Tiny Fasteners
Place one or two minute dots near the top and bottom of the escutcheon to suggest screws or pins. Use a lighter metal shade over a dark plate or charcoal over pale brass.
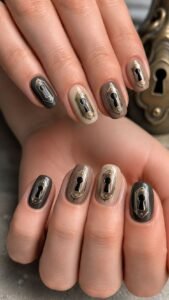
Keep the fasteners flat and evenly sealed beneath top coat. On one accent nail, add a faint curved scratch near a screw to create a worn detail. The small imperfection makes the manicure feel personal while preserving its refined structure.
Bubble Chamber Nails With Curved Particle Trails
Bubble chamber nails use fine curving paths, sudden forks, and tiny bright points to create movement across a transparent or smoky base. The design feels delicate from a distance and highly detailed up close.
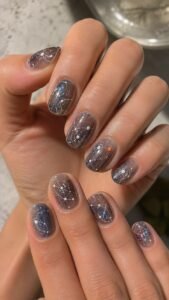
White, silver gray, pale blue, and one saturated accent color work especially well. Because the trails can enter and leave from any edge, the idea adapts naturally to every nail shape and does not require matching compositions.
Sweep Several Trails Across Clear Space
Draw two or three thin curves that travel across the nail without touching. Keep one path broad and smooth while another changes direction more quickly. Let the lines disappear beyond the edges so the imagined movement continues outside the manicure.
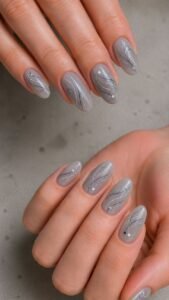
Use a sheer gray or milky base to soften the contrast, or choose deep navy for a brighter scientific look. Consistent line thickness keeps the paths elegant rather than sketchy.
Split One Track at a Collision Point
Choose one curve and divide it into two smaller paths around the middle of an accent nail. Place a tiny bright dot where the split begins, then guide the new lines toward different edges.
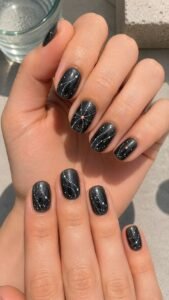
Use coral, lime, or violet only at the collision point while keeping the trails white or pale silver. Repeat the accent color as one isolated dot on another finger so the stronger detail feels intentionally connected to the full set.
Add a Short Trail of Micro Bubbles
Place several tiny circles along part of one curved path, reducing their size as they move away from the starting point. Avoid spacing them perfectly because irregular distance creates a more natural recorded trail. Keep the circles open or fill only a few with translucent blue.
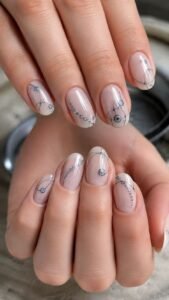
A glossy seal gives them clarity while preserving a completely smooth surface. Limit the bubble sequence to two nails so the remaining linework retains open space.
Vacuum Tube Nails With Warm Filament Glow
Vacuum tube nails combine transparent glass shapes, delicate internal wires, and a warm orange glow. The concept feels nostalgic yet sleek when the colors remain controlled.
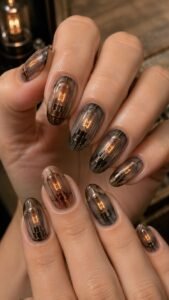
Smoky clear, charcoal, copper, amber, and soft cream create depth without oversized decoration. Longer nails can show the entire tube, while compact shapes can feature only the glowing filament and a cropped metal base.
Outline a Smoky Glass Capsule
Paint a tall rounded capsule using a faint gray or blue outline, leaving most of the interior clear. Add one narrow highlight along the upper curve and a deeper shadow close to the opposite edge.
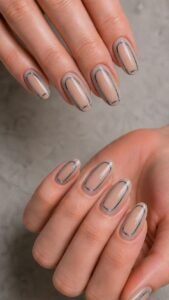
The transparent center allows the natural nail or base color to show through. Change the capsule height across the hand and crop selected forms at the cuticle or tip so the tubes appear arranged at different depths.
Draw a Fine Filament Inside
Place a thin copper or cream line inside the capsule and bend it into a simple loop, zigzag, or narrow arch. Keep the wire centered and avoid filling the surrounding glass area.
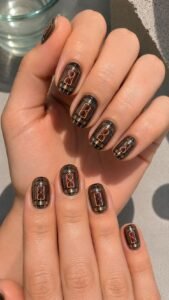
On shorter nails, use one compact loop, while longer shapes can carry two connected bends. Repeat the same wire color throughout both hands so the changing capsule shapes remain part of one coherent manicure.
Surround One Filament With Amber Light
Apply a transparent amber or orange wash around the filament on one or two accent nails, keeping the strongest color close to the wire. Fade the glow before it reaches the capsule outline.
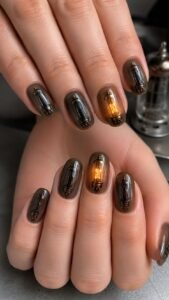
A tiny pale center line can make the filament look hotter, while the outer amber remains soft. Use only a faint warm haze on neighboring nails. This selective glow creates depth and keeps the concept wearable rather than theatrical.
Gyroscope Gimbal Nails With Balanced Circular Motion
Gyroscope gimbal nails use nested rings, angled axes, and a small suspended center to create a manicure that appears to move as the hands turn. The idea suits oval and almond shapes, but cropped rings also look striking on short square nails.
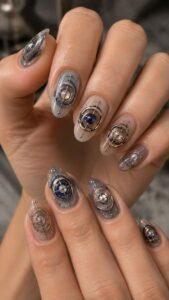
Silver, graphite, cobalt, cream, and muted rose create a modern palette. Keep the rings thin and use finish changes rather than bulky gel to suggest that one circle sits above another.
Cross Two Rings at Different Angles
Paint one narrow oval around the center of the nail, then add a second ring crossing it diagonally. Use related metallic or opaque shades so the circles remain separate where they overlap. Leave a tiny gap at selected intersections to imply one ring passing behind another.
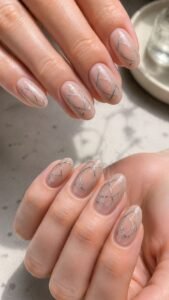
Change the angle on every finger while maintaining the same line weight. The shifting orientation gives the manicure a sense of suspended motion.
Suspend a Small Center Disc
Place one compact circle inside the rings and fill it with cobalt, muted rose, cream, or deep charcoal. Keep the disc separate from the surrounding lines by leaving a narrow base colored gap around it.
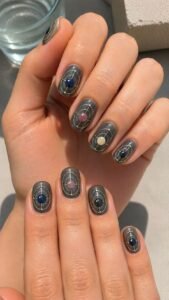
Add a tiny highlight near one edge to make it appear polished. Repeat the center color across several nails but vary its size slightly, allowing each gyroscope to feel individually balanced.
Cast a Fine Axis Shadow
Draw one slim line through the center disc and extend it beyond the outer ring on both sides. Place a softer translucent shadow just beneath the line so it appears raised without adding actual thickness.
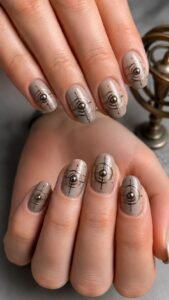
Keep the imagined light direction consistent across both hands. On one accent nail, interrupt the shadow where the axis crosses the ring, strengthening the illusion that the parts occupy different levels.
Choose the Nail Polish Design That Rewards a Closer Look
The strongest nail polish designs combine a clear visual reference with enough open space for every detail to remain readable. Spectral lines bring concentrated color, while security envelope patterns create hidden geometry. Keyhole escutcheons add polished framing, bubble chamber trails introduce graceful movement, and vacuum tubes build transparent warmth. Gyroscope rings complete the collection with balanced circular motion that changes as the hands turn.
Choose one concept that suits your nail length and painting confidence, then simplify it through fewer accent nails or a quieter palette when needed. Related inspiration for nail polish colors, regular polish designs, short nail ideas, nail shapes, nail tips, extensions, stickers, manicure care, and outfit styling can help you build a complete beauty look around the finished set.
